dbx 286s Review: Channel Strip & Mic Preamp
Street Price:
Manufacturer:
Product Links:

Trust The Process
After trying several ways to have an "always on" processing chain with various software routing methods like VoiceMeeter and AsioLink Pro, I resolved to turning to a hardware channel strip for my vocal processing. The dbx 286s stood out to me for one feature that is absent on even the highest-end channel strips...
Rackmount channel strips are usually more of a "medium" type of studio gear for a lot of people. Because of so many in-the-box functions you can do, having outboard gear isn't usually a priority especially if you're starting out - at least that was the case for me. I learned a lot from working with analog gear but ultimately, I chose the convenience of plugins.
I've always done software monitoring during recording but sometimes the latency builds up especially when the tracks and plugins start piling up. I also wanted to have some processing going into the audio interface for general communication, so I started looking into channel strips. Looking into different ones, particularly our Best Channel Strips Guide I was looking for a very particular feature.

The dbx 286s occupies a 1u rack space. I opted to have it within reach on my desk.
That feature is the noise gate. I chose the dbx 286s among many others because it's the only channel strip in the price point (even the entire category!) that has a noise gate. More expensive offerings provide better preamps, more robust equalization and compression controls and other features that make them popular but sometimes, one key feature is all it takes to secure the purchase.
With that in mind, I didn't really look too much into the rest of the circuitry and features. I just wanted a noise gate to go with a strip so when I finally put it through its paces, I was pleasantly surprised at how simple yet effective the controls are. Let's go through them one by one:
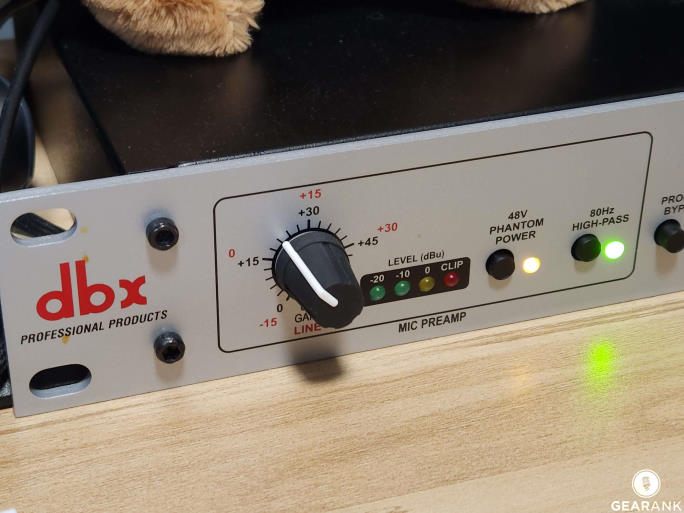
The preamp adds an upper end smoothness to mics of all kinds without making them sound muffled.
Starting off, your signal gets put through the Preamp section. While I don't think dbx based the circuitry on API gear, to my ears, it reminds me of what API preamps sound like. It smooths out the high frequencies with harmonics without muffling the input. It has enough gain to drive dynamic mics like the Shure SM57 without the need for a signal booster or Cloudlifter. For condenser mics, it has an even and transparent response at lower gain settings while pushing it close to the upper end of the gain range (before any clipping, that is) prevents any harshness or brittleness on the high frequencies.
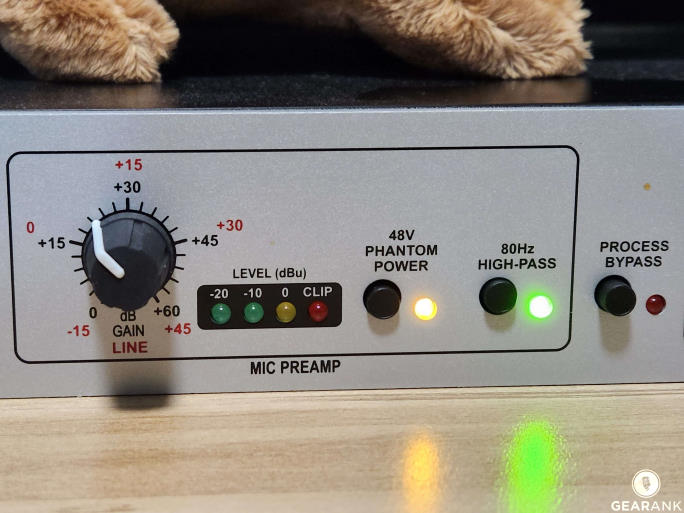
A closer look at the 286s preamp section
Other features of the preamp include a standard 48V phantom power and 80Hz high pass filter at 18dB/octave. The roll-off on the filter is enough to deal with wind and vibration transfer from the mic stand without affecting the overall tone of the mics I use. The input levels are visible thanks to 4 LEDs that indicate the amount of signal passing through the preamp.
Right next to the preamp controls is a switch to bypass all further processing past the preamp stage. This is useful for using just the preamp as it's a step up from most preamps from cheaper interfaces. My Lewitt LCT 440 Pure has a tendency to be a bit bright on interfaces like the Focusrite Scarlett Solo with the "Air" feature on. The dbx 286s preamp does a great job at providing me an alternative preamp tonality for my brighter microphones.
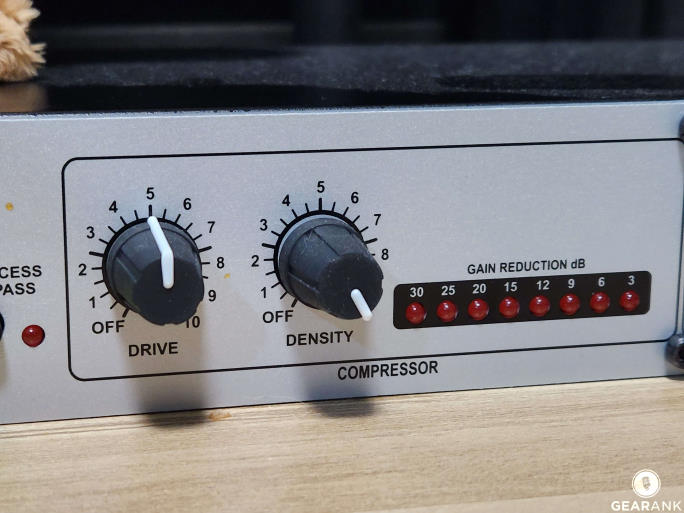
The dbx 286s compressor section works well even with just 2 controls.
The compressor section looks basic at first glance. The controls are a bit different from what most would expect. Drive is basically your threshold control, and the compression ratio is fixed at 4:1. Unlike 1176-style compressors, raising the drive does not raise the actual gain of the unit. This confusingly named control acts more like a dual-ganged potentiometer for both input gain and output gain for this stage while hitting a fixed threshold. From what I can assume about it, it feels like the makeup gain is tied to the input gain of the compressor section which is why you won't hear any changes in peak volume through the range. A strange, but effective decision. However, since it's not a standard way of naming and function, it might confuse people. I highly suggest reading the manual for further information.
The density knob is more straightforward: it is a release time knob with fully counterclockwise giving the slowest release and fully clockwise giving the fastest. The attack time is program dependent. Low level signal changes gives a slow attack time of up to 1s while faster, sudden jumps in level, achieve faster attack times down to less than 10ms. Although the controls are omitted, having a program dependent attack leaves percussive instruments punchy while speech is smoothed out. A clever decision by dbx that favors simplicity with little compromise.
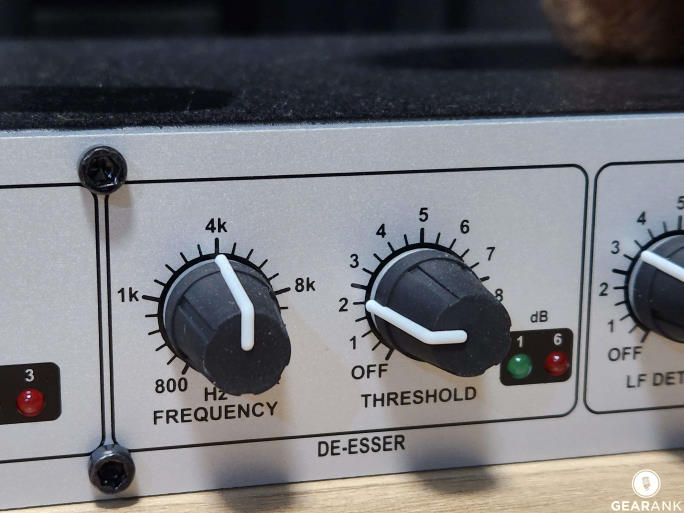
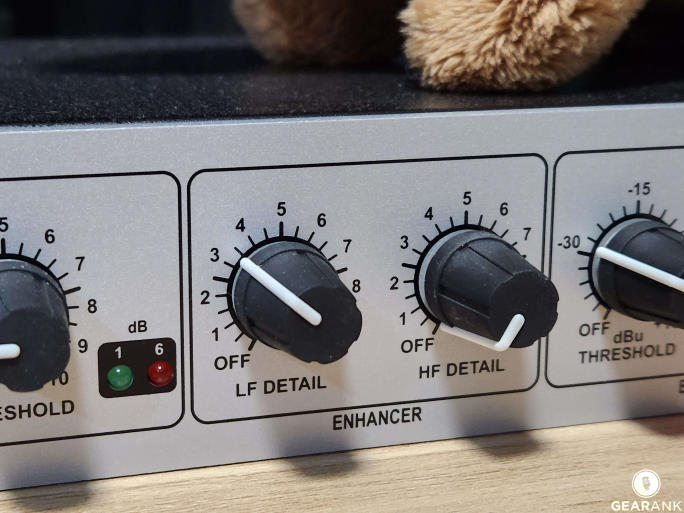
Top: The de-esser does a great job at Alleviating Sibilance. If you're used to plugins, you'll feel right at home with this module.
Bottom: The enhancer is more than just a basic EQ. It is program dependent to prevent bringing up sibilance at louder input levels.
Next is the de-esser, again a straightforward affair. Frequency determines the center of where the de-esser clamps down and threshold dictates how hard it does it. Nothing too complex here but a welcome addition to an already feature-packed channel strip.
Equalization is also simple on the outside. Labeled "Enhancer" on the unit, the low frequencies are a combination of a boost at 80Hz while simultaneously cutting out 250Hz as you go higher with it at a ratio of 2:1. The high frequency control employs a dynamic shelving EQ. I noticed that with higher speaking levels, the high frequencies don't get proportionally louder but retains clarity throughout the entire voice's dynamic range.
The expander/gate is probably one of the best I've tried for vocals. It reminds me of how SSL console's expander section feels. The gating is very natural at ratios lower than 2:1 and filters out my A/C in the background well enough for general recording. With an already treated and silent room, the expander/gate section does a great job at cleaning up the last bits of hiss or noise that might come from interference.
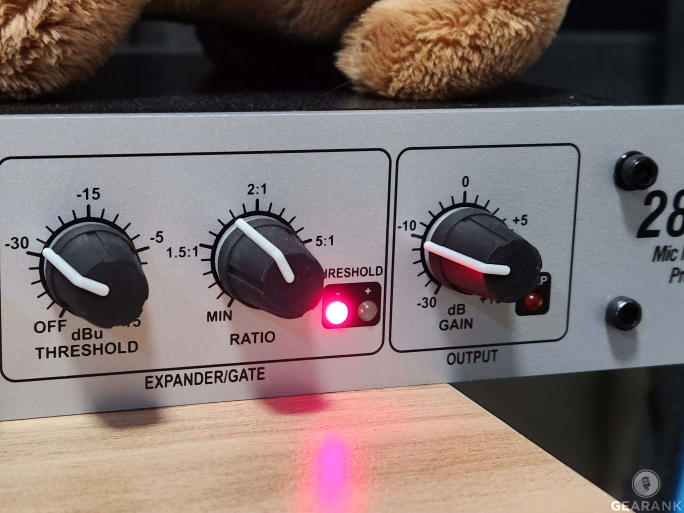
The expander/gate section ensures noise like AC hum and other low-level noise get filtered out
At the end of the signal chain is the output gain. Nothing too special here aside from the LED clipping indicator. But that wraps up this channel strips main functions.
When I first started using it for voiceovers, many people complimented the cleaner and smoother sound of my production with it. Up until that point, I've only been recording straight to DAW and adding plugins to address things like sibilance, noise and dynamics. The dbx 286s does everything better and allows me to have zero latency on my processed sound when monitoring. Using outboard gear has a neat effect of feeling more "connected" with your performance compared to having that small bit of latency around 4ms when using plugins. Sometimes it's that psychological boost that's needed to elevate performances and as the first piece of outboard gear I've gotten for my current small project studio, it's been a great tool that brings me back to my days working with analog gear in a larger studio.

A shot of the rear I/O of the 286s. Many mistake the "insert" point as another input when in fact it's used as a loop to use other outboard gear.
The great price point and feature set make it great value for any studio. Even comparing it with more expensive channel strips, it packs enough of a punch to hang with the big boys, especially with how well the dynamics are handled.
One thing that might sway people away from it would be the simplified controls for each segment following the preamp. Tweakers that rely on minute adjustments of various parameters might find the controls a bit too limited. Even so, I actually preferred this simplicity because it didn't keep me fixated on getting everything right.
Voiceover example recorded with the dbx 286s*
Specifications
- Channels: 1 (some people mistake the Insert for a second channel)
- Inputs: XLR (mic), 1/4" TRS (line), 1/4" TRS (insert)
- Outputs: 1/4" TRS - 100Ω balanced / 200Ω unbalanced
- Preamp: 0dB to +60dB gain with phantom power on XLR pins 2 and 3
- Compressor: ratio 4:1 with a threshold range of -40dBu to +20dBu
- De-Esser: frequency range 800Hz to 10kHz High Pass, 12dB/octave
- Enhancer: with high frequency program-controlled shelving equalizer, approximately 15dB maximum HF boost, and low frequency bell-shaped boost @ 80Hz, bell-shaped cut @250Hz, ratio is approximately 2:1
- Expander/Gate: with an adjustable expansion ratio from 1.5:1 to 10:1
- Rackmountable: Yes - 1U
Cons
- Simplified controls limit tweakability
Pros
- Great sounding preamp
- Gate/expander one of the best I've tried
- Dynamics and EQ well thought out
Overall
The dbx 286s is a great addition to any studio, big or small. As a vocal chain, it adds a professional sheen to singing and great dynamic control for spoken word and voice overs. While the simplified controls may not be to everyone's liking, each module is cleverly engineered to have a useful setting no matter what the input. If you're looking for your first channel strip or preamp, the dbx 286s is a great choice at a great price.
Gearank High Notes

- 2022.10: Highest Rated Channel Strip Under $500
- 2021.12: Highest Rated Channel Strip Under $500
- 2021.03: Highest Rated Condenser Microphone Preamp Under $300
- 2020.06: Highest Rated Channel Strip Under $500
- 2020.04: Highest Rated Microphone Preamp Under $300
- 2018.12: Highest Rated Channel Strip Under $500
- 2018.02: Highest Rated Mic Preamp under $200
- 2017.08: Highest Rated Channel Strip Under $500
- 2017.02: Highest Rated Mic Preamp under $200
- 2016.01: Highest Rated Channel Strip Under $500
Gearank Recommended
| Website | Source | *Rating Value |
| Gearank | Raphael Pulgar | 95/100 |
| YouTube | Podcastage | 98/100 |


