The Sound Check Process That Never Fails
Every fan expects a captivating and memorable experience when attending a live performance. A good soundcheck can make all the difference between an "OK" show and a great one.
While much depends on the musician's ability to perform, some aspects of live performance rely on diligent behind-the-scenes work.
Today, we will be discussing one of those behind-the-scenes activities: soundcheck. I have listed some simple steps to a soundcheck that never fails in this article. We will discuss:
-
What Is a Soundcheck?
-
Why Is a Soundcheck Essential?
-
Three Steps on How To Conduct A Foolproof Sound Check
-
Things To Prepare For a Soundcheck
-
Tips for Sound Check
By the end of this article, you will clearly understand the essential steps involved in a soundcheck. Additionally, we have included some frequently asked questions at the end to provide extra tips and help you answer any other questions.
These steps can be followed when conducting your soundcheck, or you can take some pointers and incorporate them into your method.
What Is a Soundcheck?
Before every performance, a sound check is conducted to fine-tune the sound system by a live sound engineer or sound tech. The objective is to ensure that the sounds are balanced, transparent, and responsive, both for the audience and the performers.
Soundchecks are usually carried out when the musicians arrives at the venue, and all their equipment has been set up. The sound engineer must ensure that each part of the setup functions and sounds as good as possible.
The duration of a sound check can vary from 30 minutes to 3 hours, depending on the venue's size, the number of performers, number of songs, and the complexity of the setup.
Why Is a Soundcheck Essential?
Performing a sound check is crucial for a successful show. It helps to avoid technical issues and reduces the possibility of unexpected hiccups or interruptions during the set.
More importantly, it assists the sound engineers in creating the best sound for the musicians. Soundchecks are meant for musicians more than anything else.
A proper sound setup will help musicians deliver their best performance and give the audience an enhanced listening experience.
Three Steps on How To Conduct A Foolproof Sound Check
Here is a step-by-step guide to conducting a sound check. It's best to do this before the venue opens to the public.
Step 1: Line Check
Before starting a sound check, it is important to perform a line check.
A line check is a process that ensures all the microphones, cables, or D.I. boxes on the stage are functioning correctly. This step is usually done before the soundcheck begins.
During a line check, verifying that all equipment is sending signals to the mixer is vital. In other words, this test checks if the input and output signals are working correctly.
-
To do a line check, follow the same order as your input list. Ask each musician to play a beat or phrase. For instance, the drums and bass can play a steady 4/4 beat, the guitars and keyboards can play a few chords, and the vocals can sing a short phrase. This will help ensure that everything is working correctly before the performance.
-
Listen to the channels, then search for and identify any faults in the equipment.
-
Repair or replace faulty equipment and fix out-of-tune instruments.
-
This is an excellent opportunity to set initial gain levels for each input and verify the correct channel.
Identifying faulty equipment or frequencies is crucial for a smooth sound check.
Step 2: Monitor Setup
Check for any feedback:
-
For vocals, place a vocal mic on stage and gradually increase the volume on the stage monitors to observe feedback.
-
When the volume increases, a ringing sound coming from the speaker indicates feedback. Identify the input frequency and use EQ to attenuate it.
-
To set up the instruments, first, adjust the volume for each instrument monitor. Then, have the whole band play a song. While they are playing, adjust the monitor volume to your liking. After the song, ask the band if the monitor volume is sufficient or if they require more or less volume.
Having their own monitor mix is crucial for musicians as it helps them maintain rhythm and stay in tune during performances.
A good monitor mix should accurately represent the sound while avoiding excessive loudness.
Step 3: Sound Check
After the line check and monitor setup, conduct a test to ensure the sound works correctly. Ask the musicians to play a song, preferably one from their set, so that you can set the ideal volume for each instrument for the actual show.
Begin by lowering all the faders and then gradually increase them in the following sequence:
-
Start by establishing the foundation of your drum sound with the kick drum and bass guitar.
-
Fill the room with other instruments, like the guitars and keyboards.
-
Bring up the snare drum first, then add the rack tom, floor tom, and overhead mics for a complete drum set mix.
-
Blend the background vocals with the instruments and adjust the levels to achieve a cohesive mix.
-
Finally, gradually increase the volume of the lead vocals until they are at the forefront of the mix, above the rhythm section.
-
EQ the mix to create a cohesive sound and prevent clashes.
Communicate
Clear communication is crucial when giving instructions to performers on stage. Whether you're in the front of the house (FOH) or control room, it's essential to express your message in a way that can be easily understood. You can use a talkback microphone or simple hand signals to communicate your message effectively.
It's also important to allow performers to give feedback and adjust their sound, especially if you're working with a band or artist with a specific sound. While you may only sometimes follow their suggestions, explaining why and being flexible enough to adapt and adjust on the fly is essential.
Don't hesitate to comment on the sound and settings, especially if you know how to enhance the overall result.
Ultimately, your goal is to strike a balance that makes the audience and the artist happy. Building a positive working relationship with performers is key to fostering better performance.
Things To Prepare For a Soundcheck
A soundcheck requires several crucial steps that should be completed weeks or even months in advance.
Submit a Tech Rider: To ensure that the performers have everything they need for the show, requesting a "technical rider" or a list of their requirements is important. This should include an input list that outlines the necessary equipment for the show. Below is a sample order of an input list for a sound check.
Example: Kick, snare, toms (smallest to largest), cymbal mics/overheads (from stage right to stage left), bass guitars (from stage right to stage left), acoustic guitar, electric guitar, keyboards, horns, strings, and other instruments, vocals (from stage right to stage left).
It is important to know what equipment you need and where to get it, especially if you require specialized equipment.
A good tech rider should include the number of performers and a stage plot, which shows the layout of their placement on stage.
And it should do so while being clear and concise (one page).
This will help you determine the equipment required to fill the stage and plan where to place each piece for optimal functionality without compromising other parts of your setup.
Note: It's recommended to have this information at least a day, week, or month before the soundcheck, depending on the size of the venue or show. A tech rider may be optional for smaller venues like clubs, but having it for reference is still helpful.
Communicate: Discuss technical requirements with the artist and musicians, including any desired special effects like reverb or delay.
Understand the Venue: It's important to remember that each venue has unique acoustics. This should be considered when planning for a sound check and show. Additionally, some venues may offer "backline" equipment such as amps, speakers, and basic drum setups. It's crucial to know the specifications of each piece of equipment and incorporate them into your plan accordingly.
Don't Waste Time: You should arrive early at the venue, double-check the equipment before the sound check, and act professionally to respect everyone's time. Aside from the initial sound check, make good use idle times (like when announcements and ads are playing) to do realtime checks and adjustments.
Tips for Sound Check
For Sound Techs
-
Double-Check: You've completed your soundcheck, and everything is working well. However, for an extra foolproof result, it's recommended to double-check.
-
Make Adjustments: You must be prepared to adjust during the performance to address any issues.
-
Stay Calm: Even if you have a great soundcheck, unexpected events can still happen. Digital mixers have built-in software that allows for easy saving and loading of settings, make use of these features.
-
Adverse weather, unruly crowds, or performers deviating from the script can impact the overall sound and performance.
-
Stay calm and focused when faced with a problem. Organize your thoughts to find the best solution.
-
Keep in mind that performances rarely go 100% according to plan. The best techs are the ones who are always prepared, even when things go wrong.
For Performers
If you're a performer, remember that a sound check is crucial to ensure you sound your best onstage. Make it count.
-
Focus on the soundcheck: During soundcheck, only perform what the sound engineer instructs. Avoid playing unnecessarily, especially when other musicians are soundchecking.
-
Be Professional: Like sound engineers, musicians must respect others' time. Arrive early, build a good relationship with your sound tech, and set up your equipment.
-
Pay Attention: During soundcheck, provide input for band harmony. Notify sound tech of any issues, such as monitor mix problems.
-
If any technical issues arise, please remain patient and offer assistance to resolve the problem.
-
Trust in Your Tech Team: They have extensive experience with live music, so you can trust them to make you sound amazing.
Final Thoughts
A soundcheck is a crucial part of any live event or performance. It allows the performer's sound to be set up before the show.
A successful sound check ensures the sound is good and boosts the performers' confidence. Hearing themselves clearly through the monitors and knowing they can be heard through the mix helps them perform better. As a sound tech, your work has much to do with the show's outcome, even though you may not be that visible to many.
A good performance can mean you've done an excellent job.
You can follow all the steps mentioned here or choose the aspects you like and incorporate them into your sound-checking process.
If you still have questions, check out the FAQs and other tips below.
Frequently Asked Questions
Can a soundcheck Resolve All Technical Problems For The Performance?
Conducting a sound check before a performance is a crucial step in ensuring audio quality. It involves testing and adjusting the sound equipment to identify and address any technical issues affecting performance. However, despite the thoroughness of the sound check, it cannot guarantee that all problems will be resolved. Some issues may only arise during the actual performance, so it is important to have a skilled technician on standby to address any unforeseen problems.
Is it Possible to Conduct a Soundcheck in Silence?
Ensuring all audio equipment is operational before any event or performance is crucial. To confirm this, it is necessary to hear sound from the equipment. If there is no sound confirmation, it indicates that the audio equipment is not functioning correctly. Alternatively, you can perform a sound check at reduced volumes to ensure the equipment works perfectly. This will help to avoid any technical issues during the event or performance. Still, proper sound check should be done prior to audiences coming in, so you can test at the proper volumes, without worrying about being too loud.
Who Takes Part in a Soundcheck?
Doing sound checks is an important part of knowing how to start a band. In addition to the audio engineer and musicians, the production staff may also express interest in participating in certain aspects of the production process. Their involvement could range from providing creative input to assisting with technical aspects of the production.
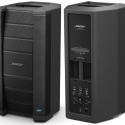
What is a PA System?
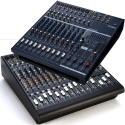
A public address system, commonly known as a PA system, is an electronic setup that comprises a network of microphones, amplifiers, mixers, and loudspeakers. The system is designed to amplify and distribute sound signals to a large audience in a given area. The amplifiers boost the audio signals from the microphones while the mixers adjust the sound levels and balance the audio inputs. On the other hand, the loudspeakers are used to broadcast the amplified sound signals to the audience.
Contributors:
- Jerome Arcon - Co-writer
- Jerry Borillo - Illustrator