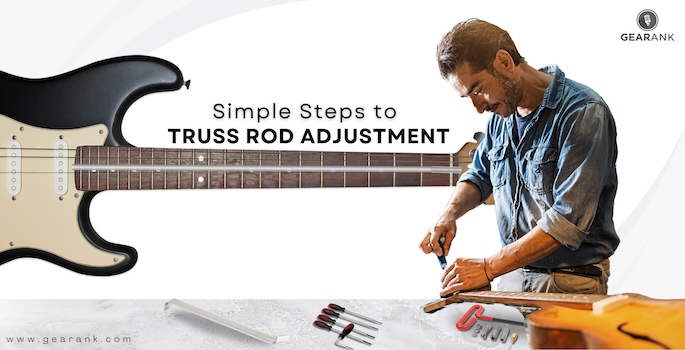
Truss rod adjustment is a crucial yet sometimes overlooked maintenance process for guitars.
The truss rod is important in keeping the structural integrity of your instrument. And adjusting your truss rod can improve your guitar’s playability and address fret buzz, high action, and other fretboard-related issues.
Here you’ll learn how to adjust your truss rod and have a better understanding of its function. I’ve broken down the article into these main sections:
-
What is a Truss Rod
-
Truss Rod Adjustment Tools
-
How To Do a Truss Rod Adjustment
-
Truss Rod Troubleshooting
-
Three Common Types of Truss Rods
By the end of this article, you’ll know how to safely adjust your electric or acoustic guitar’s truss rod.
What is a Truss Rod
A guitar truss rod is a long metal bar that runs through a guitar’s neck. The truss rod’s main role is to provide structural support for the neck as it handles the pulling force of the strings.
This guitar neck reinforcement was developed to support the extra force that steel strings were applying to necks, at the time when steel strings were replacing replacing nylon and gut.
Steel strings apply around 150-200 lbs/68-91 kg of force to the guitar’s neck. The truss rod helps counter that force. Truss rod tension and relief on a guitar’s neck balances the pressure applied by the pull of the strings, keeping the guitar neck straight while adding a slight bow onto the fretboard.
In short, without a truss rod, a guitar neck will gradually warp, or in worse-case scenarios, even break beyond repair due to immense string tension.
A working truss rod enables guitars to handle steel strings, including thick gauge ones used in bass guitars. And it does so while allowing for just the right amount of neck bows for good action and intonation.
This is the reason why truss rods are common in modern-day guitars. But note that some really old guitars don’t have them, they don’t allow for any type of fretboard or neck adjustment. Be wary of this when handling or playing relic guitars.
Why is Truss Rod Adjustment Needed?
Truss rod adjustment is the process of altering the curvature of a guitar fingerboard using the truss rod built into its neck.
Changes in temperature, humidity, and string gauges can cause an up bow or back bow to your guitar’s neck.
Adjusting the truss rod can help counter these issues and prevent other problems like fret buzz, high action, and playing discomfort.
Truss Rod Adjustment Tool
Adjusting your truss rod doesn’t require too many tools. A regular allen wrench would usually suffice for most guitars. But there are some that require specialized tools. Below are some of the most common tools used for adjusting the truss rod:
-
Hex Wrench
-
Ball-end Allen Hex Keys
-
Truss Rod Crank for Tele
How To Do a Truss Rod Adjustment
STEP 1: ASSESS YOUR GUITAR – Before you make any truss rod adjustment, check if the guitar needs it.
With your guitar tuned to standard, check the guitar’s neck for excessive bowing. Check for symptoms like string buzz due to unusually low action or the opposite, unusually high string action.
A. The first way is called “Sighting”. It entails using your eyes to look down from the guitar nut to the body end. You want the fingerboard to have a relatively straight edge, with a slight bow.
If you see the neck bending excessively inwards, you have an upbow. On the other hand, if it bends outward, then you have a back bow.
B. Another way to do this is by checking the string height. Using your finger or a capo, press the strings on the first fret, as well as the 14th fret.
Notice the string distance from the fret wires. Do a tap test on the middle part in between those two fretted areas. If you don’t see a bounce, then you have a back bow or backward bow neck. In contrast, if the strings have too much bounce, then you have an upbow or a forward bow neck.
You can also use more precise tools like feeler gauges.
STEP 2: LOCATE THE TRUSS ROD
For acoustic guitars, the truss rod adjustment nut is usually found inside body, on the neck joint area. The nut is accessible via the soundhole.
While for electric guitars, it’s usually at the end of the guitar neck, under the truss rod cover, on the headstock.
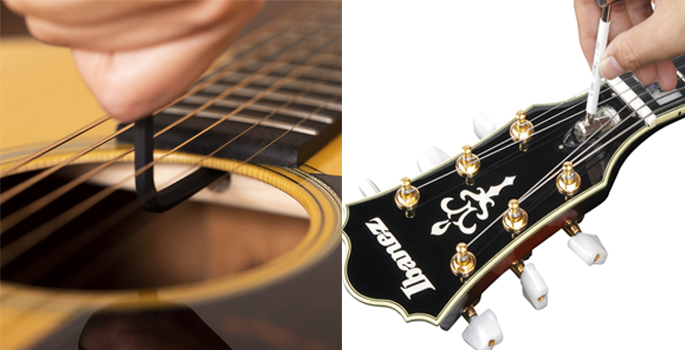
Other electric guitar models, like the Telecaster, have its truss nut at the opposite end of the guitar neck, adjacent to the guitar’s body.
STEP 3: ADJUST THE TRUSS ROD – Once you’ve identified the issue and the truss rod nut location, it’s time to properly adjust your guitar’s truss rod.
Some guitars have a truss rod cover, remove it first. Then, with the correct tool, turn the truss rod incrementally as needed. Never overdo this, as it can damage your guitar.
Turning the truss rod nut clockwise stiffens it, which in turn reduces the upbow. Turning the truss rod nut counter clockwise will loosen the truss rod, reducing its stiffness. This alleviates excessive backbows.
Your aim is to have a slight neck relief or gap from the strings to the fret wire. It should be small enough that you’ll need little effort in playing but wide enough that the strings wouldn’t buzz against the frets. Remember to allow for truss rod relief, never max it out both in stiffness and slack.
Note: Again, over-tightening or loosening the truss rod could potentially damage the guitar neck. So, remember to do this adjustment in small increments while checking the neck relief after each turn. Your goal is to fine tune, not to rush big changes.
STEP 4: TEST YOUR GUITAR – After each small adjustment, check if you’ve reduced excessive bowing. Then play your guitar to feel if you’ve got the right neck relief.
If the string action is still unusually high while your pressing down the strings, you might have an upbow. Therefore, you have to gradually tighten your truss rod slightly.
On the other hand, if you hear some fret buzzing, you might have a back bow that needs some slack from the truss rod. Again, adjustments should be done in small increments.
You don’t need to go for a completely straight neck, just adjust your guitar’s truss rod until you achieve your desired playability or sound.
If adjustments are not affecting the neck bow, then you’ll have to bring your guitar to a luthier or an experienced guitar tech.
Truss Rod Troubleshooting Tips
Here are some top tips on how to fix the most common truss rod adjustment issues.
-
Truss Rod Turns Loosely – If you notice that your truss rod spins freely without resistance, chances are the truss rod is broken. This means that your guitar truss rod needs to be replaced, which requires a major repair done by a qualified luthier.
-
Difficult To Turn The Truss Rod – The truss rod nut will feel stiff, but it should turn. If your guitar’s truss rod is difficult to turn, it might be because it’s maxed out. This means you can’t make it stiffer. If you can’t turn the truss rod, it is best to take it to a professional.
-
Stripped Truss Rod Nut – Adjusting the truss rod will eventually wear it down. In this case, the only solution is to have the truss rod replaced. This procedure will require an experienced professional.
Three Common Types of Truss Rods
Generally speaking, there are three kinds of guitar truss rods. These three all serve as a counterforce for the tension created by the strings. But, each one functions differently from the other.
Single-Action Truss Rod
A single-action truss rod corrects a forward bow and a back bow. Fastening it corrects a forward bow, while loosening it corrects a back bow.
Dual-Action Truss Rod
Dual-action truss rods are usually made up of two metal bars instead of one. Each bar functions differently. One truss rod corrects a forward bow, while the other corrects a back bow.
Fixed Truss Rod
As its name suggests, this type of truss rod can’t be adjusted. It’s also known as the traditional or oldest type of guitar neck reinforcement.
Vintage and classical guitars are usually fitted with this feature, with the “T-bar” truss rod being the most common example.
Note: You can know which one is installed in your guitar’s neck by the user manual that comes with the guitar. You can also try searching online for the guitar model and checking its specs.
Final Thoughts
Now you have the caution, and following the steps above, you can do a truss rod adjustment using simple tools and a few careful turns.
Remember to check the guitar neck relief after each turn in order to avoid any damage. You’ll become more efficient the more frequently you do this.
Ultimately, your goal is to achieve maximum playability and eliminate fret buzz. Once you’ve achieved those, you’ll improve your guitar-playing experience even more.
If you’re not quite confident still, you can read the instructions again or seek the help of a professional tech.
Frequently Asked Question
Can I Damage My Guitar If I Adjust The Truss Rod Myself?
Yes, but you can avoid it by exercising caution. Let me explain.
A guitar’s body is sturdy enough to handle a few more pounds generated by a truss rod adjustment. It’s initially designed to withstand a lot of tension created by the strings after all.
Also, with the proper tool and by following the steps I mentioned here, this process can be done without causing harm to your guitar.
Most guitar manufacturers also provide detailed instructions along with their guitars. You can refer to that for additional information and guidance.
Lastly, if you’re really not confident about trying it yourself, you can always turn to a professional for help.
How Often Should I Adjust My Guitar’s Truss Rod?
There can be a number of reasons why you should adjust your guitar’s truss rod. But these three are the most common:
Seasonal changes also mean a change in humidity. This can cause the wood on your guitar to expand or contract, which in turn can change neck bow. It’ll be expensive to get this professionally done every season, so it’s practical to know how to make small changes on your own guitar.
Another is when you’re changing string gauges. A different set of strings will apply a different string tension to your guitar (especially when changing from a significantly thick or thin string gauge). So, it’s worth checking your guitar if a truss rod adjustment is needed.
Lastly, is guitar action. Your guitar’s action refers to the string height.
For example, lower action will require less effort to play, however, adjust it too low and your strings will have fret buzz. On the flip side, the higher the action is the more effort it will need to play your guitar. In either case, a truss rod adjustment is needed in order to improve the overall feel and playability of your guitar.
Contributors:
Jerome Arcon – Co-writer
Jerry Borillo – Illustrator