The Complete Guide to Measuring and Adjusting Guitar Action
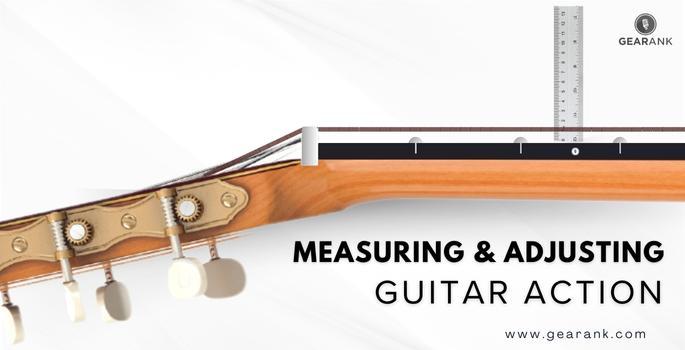
Guitar action is a crucial aspect of your guitar setup. It's one of the first things luthiers inspect when setting up your guitar.
A full guitar neck setup will require professional work, but you can do basic checks and adjustments to maintain good string height and action.
In this guide, I'll show you how to check for string action issues and make adjustments. We'll go over the following:
-
What Exactly Is Guitar Action?
-
High or Low Action: Which is Better?
-
Action Adjustment: Electric Guitars
-
Action Adjustment: Acoustic Guitar
Find out why it matters. How to learn to measure and adjust a guitar's action yourself.
What Exactly Is Guitar Action?
Guitar 'action' is the term used for the string height on your guitar. In short, it is how high or low the guitar strings sit over the fretboard.
This is essential to how the guitar plays. Lowering the action makes your guitar play easier.
For instance, when the action is too low, you may hear some fret buzz. On the other hand, when the action is too high, it can be uncomfortable and difficult to press the strings.
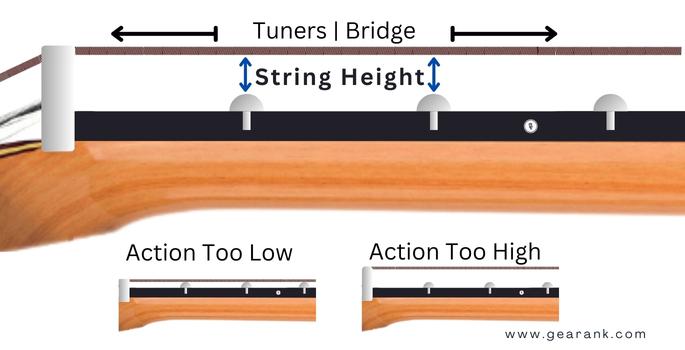
The first step to having good guitar action is properly measuring the string height. You can use a string height gauge for more precise measurements or improvise if you don't have one.
Next is adjusting your guitar's action. To get your guitar sounding just right, it's crucial to adjust its action. There are multiple methods to accomplish this, we will go over them further below.
For now, let's go over measuring guitar action.
How to Measure Action
1. Using a String Height Gauge, Feeler Gauge, or Precise Ruler
The measuring process involves holding down the first fret to remove the nut height as a factor. You can do this via a capo, so you have two hands-free for checking.
If you don't have a capo, you can hold the strings down tightly on the first string with your hand.
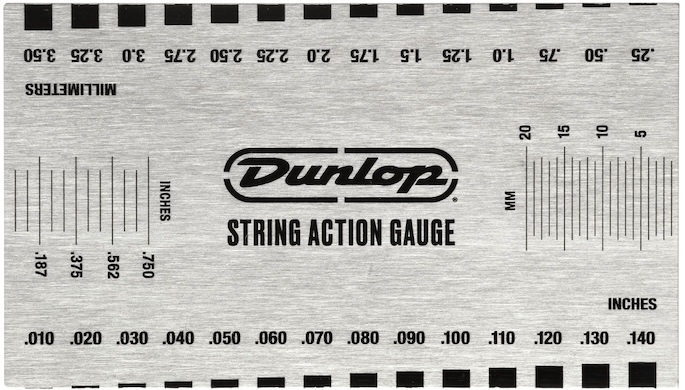
To measure string height, with a ruler (the one with millimeters) measure the string height on the 12th fret. A common string height is around 2mm.
To get accurate measurements, use a precision ruler like the string height gauge mentioned above.
You can then base your adjustments on the measured height. Repeat this process every time you make incremental adjustments.
2. Utilizing a Pick (2 picks)
You might not have a ruler with you at all times, but there's a huge chance you'll have a pick with you. This method is very useful if you're traveling and don't have the proper tools with you.
Like earlier, capo on the first fret or fret it with your finger.
Then use a stack of 2 picks under the 12th fret (given the picks are 1mm pick). Fitting the two picks snuggle means that you have around 2mm of string clearance.
Make sure there is enough space for the movement of the strings as the guitar's strings vibrate. If the strings hit the fret wires, unwanted fret buzz and other noise will occur.
Action Adjustment On Electric and Acoustic Guitars
Now that you have measured the string height at the 12th fret, you're ready to make adjustments.
There are many ways to go about adjusting string height, here are some of the most used methods.
Electric Guitar
Electric guitars usually demand lighter playing, and a lower action paired with light strings complement that style. In terms of amplification, electric guitars get the benefit of having pickups rather than depending on sound vibrations alone, like acoustic guitars.
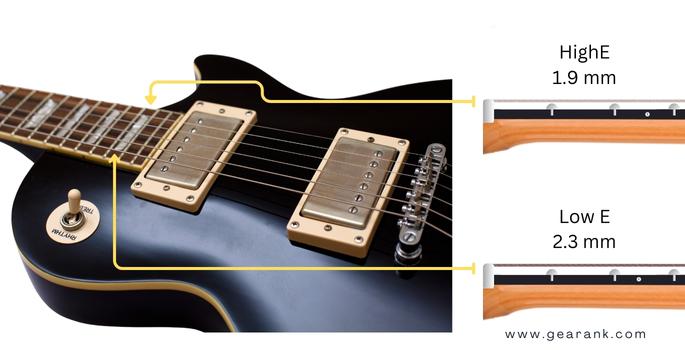
However, when it comes to electric guitars, it's not that straightforward. Some bridges will allow you to adjust their individual string height, whereas others may only allow you to adjust the height across the bridge.
Electric Guitar's Ideal Action: The usual action for an electric guitar is set at around 5/64" or 1.9mm on the high e string (treble side), and 6/64" or 2.3mm on the low e string (bass side).
Adjust in small increments, play all the other strings, and see how the guitar feels. Also, watch out for any fret buzz. If so, gradually raise the saddle until you don't hear any cutting with the notes or fret buzz.
Electric Guitar Action Adjustment: The following shows three of the most common electric guitar bridge saddles. In reality, there are a lot of them out there, but we'll be focusing on the ones that you'll most likely encounter.
A Gibson-style bridge (also called tune-o-matic bridge) has two adjustable screws (bridge post) on either side of their bridge. The two screws can be lowered or lifted in order to adjust the action.
Note that adjusting the bridge's height will affect the middle strings unless the bridge hardware allows for individual saddle height adjustments.
A Floyd Rose Bridge lets you adjust the bridge height from both sides, similar to Gibson style bridges. But there are advanced Floating bridges that give you more control over the heights of each saddle.
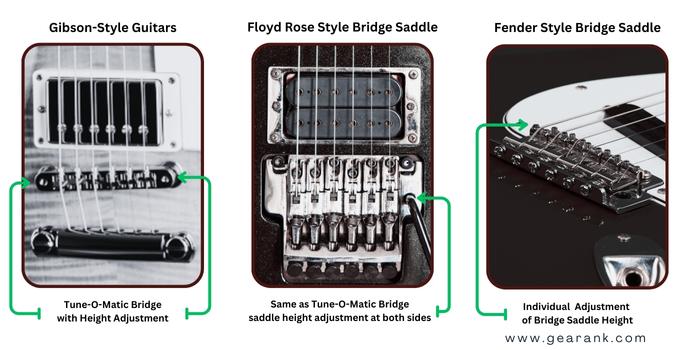
The Fender-style bridge is the easiest one to adjust. It needs a 1.5-mm Allen wrench to adjust its individual bridge saddle height, which conveniently lies on both ends of the saddle.
As you can see, it has two screws on both sides. Professionals can meticulously set the height of each string individually to match the neck radius.
Be warned that excessive bridge adjustments can result in issues with your guitar's intonation.
Acoustic Guitar
Steel-string acoustic guitars need more space for them to resonate well. That is why you'll often get a higher action on an acoustic than an electric guitar.
Acoustic Guitar's Ideal Action: The ideal action for an acoustic guitar is set at around 5/64" or 1.9mm on the high e string and 7/64" or 2.77mm on the low e string. A relatively higher action compared to an electric guitar.
An acoustic guitar relies on its body to produce sound. So, the higher the action, the more space in which the strings can resonate. This will result in a louder sound, which is great for strumming chords.
Acoustic Guitar Action Adjustment: Adjusting an acoustic guitar's action is not as simple as on an electric guitar. But acoustic guitar adjusting is essential for maintaining optimal playability and sound quality.
First, to lower the saddle, you'll have to file it down. In small increments, file down the saddle while making sure that it's at your ideal level.
On the other hand, if you want to raise the saddle, you can shim it. Ideally, it should be shimmed with the same material it's made of. For example, a bone shim for a bone saddle and a plastic shim for a plastic saddle
Once you have the materials, glue the shim together with the bottom end of the saddle. After it dries up, slowly grind the saddle to the appropriate level.
Don't forget to test by playing all the strings. Look out for fretbuzz if the string height is set low.
This method is applicable for other acoustic stringed instruments like a classical guitar, parlor guitar, and more.
REMINDER: Instead of shimming your saddle, you can opt to buy a new one. Shimming takes a lot of care and precision work. So, if you're not too confident, it's better to hand this task to a professional tech.
Truss Rod Adjustments
Another way to achieve good string clearance is by adjusting the truss rod. But truss rod adjustments should be done as a last resort, as you can damage the neck of your guitar when the truss rod is improperly tweaked.
The truss rod lets you adjust your guitar's neck relief, which gives you either a straight neck, or a slight bow. The slight curvature can move the fretboard slightly farther from the strings.
Electric guitar truss rods are usually found under the truss rod cover, which covers a hole between the guitar neck and the headstock. While acoustic guitar truss rods are usually accessed through the soundhole, mounted on the neck itself.
Using an Allen key, turn the truss rod to tighten or loosen it to meet the common string height of 2mm.
Word of caution, be very careful when adjusting the truss rod, and only do small increments depending on your string gauge.
Never overtighten or over-loosen the truss rod too much. When you're guitar is equipped with thicker strings, loosening the truss rod may cause excessive bowing of the neck. The reverse is true for those with thinner strings.
High or Low Action: Which is Better?
Typically, I would advise that you go for a low action. Keeping the strings as low as possible ensures maximum playability, This is the way I set up my electric guitars and parlor guitar, and I find this works best for comfortable playability.
Note that my setup might not work well for you, especially if you're an aggressive type of player who pick your strings hard. Having your action too low might cause some fret buzz. In this case, you'll want to raise your action a bit; it will increase string tension to prevent unwanted fret noise.
If you have a gentler playing style, you need not worry much about string buzzing. So adjust your action according to your playing style.
Note that for acoustic guitars, lowering action can take away some of the fullness of the sound. This is why I keep my string height at standard for most of my regular sized acoustic guitars. Thinning of acoustic guitar tone can also result if you switch to thinner gauge strings. To be fair, thin acoustic tone is not always bad, it will depend on the style of music and personal preference.
Final Thoughts
Now that you've learned how to measure and set your guitar action. You're now more aware of how to fine-tune your instrument.
If you're an aggressive player, a high action will fit you, while a lower action will be enough if you have a gentler playing style.
Understanding which category you fall into is critical, as this can affect playability. You want to find the most comfortable height without string buzz and too much string tension.
And while on the subject of guitar actions, here are some FAQs often related to the subject.
Frequently Asked Questions
Does Higher Action Have Better Tone?
Yes, it can affect the tone. A high guitar action will cause the strings to resonate more. Meaning it will sound louder, which can result in a different timbre, which is essentially a change in tone.
Does Lower Action Make Bending Easier?
Yes, it can make bending easier. The majority of guitar players, especially electric guitar players, want this kind of setup.
Aside from making bends easier, a low guitar action can also mean less stress on your hands because of the lesser force it requires to play.
But watch out because this type of setup is easily susceptible to fret buzz. Always be aware of any dead notes (notes that don't ring out) on the fretboard.
Contributors:
Jerome Arcon - Co-writer
Jerry Borillo - Illustrator


