Gain Staging. How to Build your Mix Quality Through Each Step
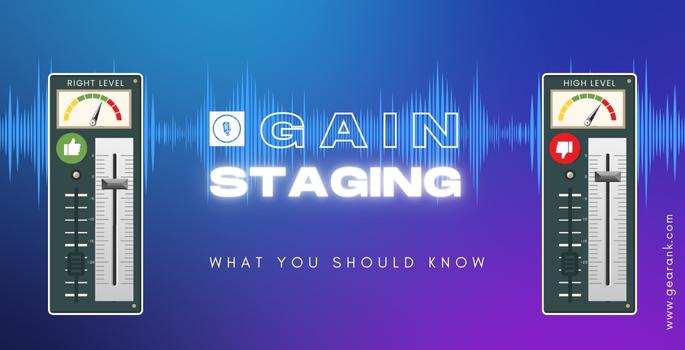
Gain StagingThe Gain Staging process optimizes the audio signal and reduces unwanted noise by adjusting levels at each step of the signal chain. |
Achieving a perfect mix is one of the biggest challenges in audio production, especially in music. To ensure that your mix is of the highest quality, you must pay close attention to gain staging. Although this term may be unfamiliar to some, its importance cannot be overstated.
Gain staging, also known as gain structuring, involves setting the gain for each amplification within a mix to achieve the desired volume level while minimizing noise and distortion. In this article, I will delve into the technicalities of gain staging and explain why it is a crucial aspect of any mix.
Understanding Gain Staging
Gain staging is a crucial technique that involves adjusting the audio level sent to the subsequent processor in the chain to achieve the ideal volume level. Proper gain staging is necessary to minimize noise and distortion and to achieve the highest possible sound quality when recording.
The term "optimal" refers to volume levels that are strong enough to exceed the recording's noise floor without overpowering the subsequent processor in the chain or causing immediate distortion.
Gain staging has undergone significant changes, transitioning from the analog to the digital era. Although many still prefer analog gain staging due to personal preference and the sound they wish to achieve, digital gain staging has become the norm. Let's take a closer look into analog and digital gain staging differences in the following sections.
Analog Gain Staging Beginnings
Before the digital era, analog gear was used to create records. However, achieving satisfactory results was challenging, as every piece of equipment in the signal chain needed to be appropriately leveled. A "good result" could mean either a clean recording or a pleasingly saturated one, depending on the material.
Gaining staging was necessary in the analog world to avoid the persistent hiss that come with recording too quietly. This process involved changing the level at each amplification step to ensure a good signal-to-noise ratio and no useless distortion.
Every aspect - from the source to the mix bus - must be considered when using analog equipment. The track level, all its processors, and stereo bus processors must be regarded to achieve the desired outcome.
To minimize background noise, staying too close to the floor noise must be avoided, but enough headroom should be given to prevent distortion. A safety zone or buffer is essential to handle brief, noisy bursts or spikes without significant degradation.
Transition to Digital Gain Staging
In the digital realm, the term "decibels full scale" (dBFs) refers to the highest level that can be reached without digital clipping. This used to be a major challenge for music producers as the audio quality would suffer if the audio went above the fixed point.
The advent of floating-point processing has revolutionized digital gain staging. Most digital audio workstations (DAWs) today use 32- or 64-bit floating-point processing, which allows for much more flexibility in handling audio.
Most plugins now have input and output gain controls, offering users more control over the audio signal.
With floating-point digital gain staging, you can access several digital gain staging plugins, including pre-fader metering and utility/trim plugins.
Pre-fader metering allows you to see the signal level regardless of the fader position, which is important because each plugin you add to a digital console can add distortion to the input signal.
Utility/trim plugins, on the other hand, allow you to adjust the clip's gain to ensure you are getting a healthy signal that is ideal for the plugins you intend to use.
By placing a utility/trim plugin at the top of your signal chain, you can modify the gain there, and every insert that follows it will receive a signal reflecting the gain change. If a plugin has an output gain control, then a trim plugin won't be necessary.
Not all gain staging plugins are suitable for digital use, as some are designed after analog gear. These plugins can cause too much distortion if pushed too hard. Therefore, it's essential to exercise caution when using these plugins.
Why is Gain Staging Important?
Proper gain staging is crucial for producing a well-organized and dynamic mix. It ensures that both analog and digital processing operate at their optimal levels.
Conversely, an incorrect gain structure can cause frequency imbalances, cluttered soundstages, and harsh digital clipping. These problems can ultimately affect the quality of your mix and cause it to sound subpar on different sound systems.
Therefore, it's essential to use gain staging throughout the mixing process to achieve a more transparent and higher-quality sound. Having an average level for all tracks at the beginning of the mixing phase makes the rest of the mixing process easier.
Reduction of noise and distortion
In audio recording, the level of unintended noise that enters a recording is known as the "noise floor." This can accumulate and become more noticeable in the mix if there is even a tiny amount of noise on every track in a project.
When recording sounds using a microphone, such as a vocal or an acoustic guitar, the noise floor can still be a problem. Recording at a too-low gain level can lead to the addition of extra background noise to the audio. This will be prevalent as you apply signal processing like compression and saturation.
Gain staging can help balance the levels of the audio signals, thus reducing the noise floor and making it less noticeable while maintaining a strong signal.
To avoid clipping
When an audio signal is clipped in the digital domain, it means that its peak values have been cut off, which results in digital distortion and can cause a significant loss of sound resolution.
This can happen when there is inadequate headroom, which is the difference between the loudest signal and the maximum level that a device can handle before distorting.
What does a music producer do in this case? Skilled music producers can identify issues with a mix when they notice signals approaching the red zone, which is the point where the signal is close to clipping.
Note that any audible audio clipping and digital distortion is extremely difficult to fix during mixing.
Improves sound quality
Achieving optimal gain staging and a well-structured gain setup is an indispensable aspect of the mixing process. This can lead to several benefits, including improved signal-to-noise ratio, minimized distortion, and enhanced headroom, which are critical factors in achieving clear and transparent mixes.
Allows for more headroom
In order to achieve the best possible results during the mastering process, it's important to incorporate a proper gain structure into your workflow. This means setting the levels of each track in your mix so that they provide consistent headroom and don't cause any distortion.
One way to achieve this is by maintaining a minimum of -6 dB of headroom in the master channel while mixing your song. This ensures that there is enough space for your mastering engineer to work with and produce a polished final product.
By following this recommendation, you'll be able to achieve a balanced mix without any unwanted distortion quickly and efficiently. This will ultimately result in a high-quality, professional-sounding finished product.
Ensures even and consistent levels
Maintaining optimal levels during the mixing phase is crucial for ensuring that signal processors perform at their best. Proper gain reduction techniques, such as compression or limiting, play a key role in achieving a balance of volume and clarity across all channels and tracks in the mix.
How to Perform Gain Staging
Effective gain staging is a crucial technique that can significantly enhance the quality of your mixes. However, to achieve optimal results, following a few key steps is essential.
Start with the source
To achieve impeccable sound quality, there are a few techniques that can be employed on your recording medium. One of the most important ones is to position microphones as close to the source as possible, as this ensures a strong incoming signal and minimizes background noise. Remember to factor in your microphone's SPL handling, otherwise you risk damaging it.
In addition to this, using a pop filter can be extremely helpful when recording vocals. This is because plosive sounds, such as "p" and "b," can create sudden bursts of air that overload the microphone's capsule or your preamp, resulting in distorted or poor-quality recordings right at the beginning.
A pop filter is designed to mitigate these issues by diffusing the air and dispersing the pressure, thereby preventing any unwanted bursts in the incoming signal from being captured. It also helps achieve a better gain setting from your audio interface.
Check Filters and Pads
Microphones and live sound mixing desks are equipped with pads and filter features that play a crucial role in gain staging. The pad switch helps attenuate signals that might otherwise overload the input, thus lowering it. However, it is important to use the pad or pads on microphones only when required, as it causes a gain decrease at the top of the dynamic range which can be a problem as soon as your analog recording is converted into the digital world.
Switchable high-pass filters filter out low-frequency noise, which can affect the input stage of a preamp. This range's frequency is associated with noise from handling, wind, and other sources.
One can significantly reduce noise in their system by filtering out low-frequency signals. Instruments and voices that require low-frequency content, such as kick drums, floor toms, and bass guitars, should be kept from being filtered out during early gain stages.
Calibrate Preamps and Faders
Experienced live sound engineers might sometimes need to set up a mix from the preamps and mix again from the faders. This approach is inefficient and can lead to bad gain structure. It's important to know the difference between gain vs volume.
A better alternative is to increase the signal flow in the mic pre until the input reaches the ideal minimum operating level. Then, adjust each channel by setting the master fader and channel fader for each track from unity gain.
Most live sound mixing consoles have an indicator that shows when an incoming peak reaches a threshold just below clipping. You can achieve perfect input gain by turning up the mic pre until the warning light glows at the highest peaks.
After that, you can slightly reduce the gain to ensure a strong signal and provide additional headroom to avoid clipping if the EQ is slightly boosted or unexpected disturbances occur.
This approach allows you to use the faders to reduce extra loudness rather than enhancing noise as you mix.
Equalization and output gain
The equalizer section receives the signal after the preamp in an audio system. If you have an EQ with a bypass switch, use it to eliminate an unnecessary gain stage from the signal path.
Consider each frequency band as a separate gain stage when using the EQ. If the gain is kept at 0 dB, the overall headroom and noise floor should not be affected since they are at unity.
Please note that boosting or cutting frequencies affects the output of the signal chain. Therefore, checking how much the signal gain is affected is best. Most EQs come with an output gain control that you can use to compensate for level changes.
Analog EQs are often used for their unique character, which can add more harmonics to tracks. Some designs can produce a pleasing result when creatively pushed, while others have a different character. It is crucial to be familiar with your plugins or equipment.
Tips for achieving optimal gain staging
Keep everything at an appropriate level
Proper gain staging is crucial to achieve a balanced sound in your mix. It involves setting the input gain control at an optimum level and ensuring all the faders are at appropriate levels.
When mixing multiple tracks, adjusting each track to an optimum gain level is important to get a clear view of how they interact without overloading any part of the signal chain.
To get the best headroom, it's recommended to save your loudest track at unity gain and then balance your mix by lowering other elements around it. This approach ensures you have enough headroom at the end of the mixing session, as continuously boosting levels will result in reduced headroom.
Don't exceed the digital limit
Remember that a 24-bit file that exceeds 0 dBFS will have permanent distortion. While 32-bit files are becoming more common, they are not widely used in audio streaming services. Most distribution systems only accept 16-bit files unless you are willing to pay extra for higher-resolution audio. However, the majority of users still use 24-bit files. Therefore, it is recommended that you aim for a file that works well in a 16-bit fixed-point. These regulations may change, but for now, this is the standard.
Conclusion
Achieving optimal mix quality is a complex process requiring attention to detail, and proper gain staging is an essential component. The fundamental objective of gain staging is to ensure that all audio signals in a mix are balanced and that there is no digital distortion. By adjusting the levels of each track in a mix, gain staging helps to prevent any track from dominating the mix at the start of the process.
The concept of gain staging can be straightforward to implement, but it requires a thorough understanding of signal processing. It involves setting the levels of all the tracks in a mix to an optimal level and ensuring that the gain structure is consistent throughout the mixing process. Gain staging also involves using compression and limiting to control each track's dynamic range and prevent clipping or distortion.
In summary, gain staging is essential for achieving optimal mix quality. It enables audio engineers to ensure that all tracks in a mix are balanced and that there is no digital distortion. By implementing proper gain staging techniques, engineers can create high-quality mixes that are pleasing to the ear and free from unwanted noise.
Frequently Asked Questions
What Happens When You Don't Gain Stage?
Neglecting proper gain staging can result in a suboptimal mix that falls short of its full potential. When mastering the mix, issues such as high noise levels or excessive loudness will be challenging to address. Therefore, adhering to correct gain staging practices is imperative to achieve the best possible results.
Are Gain And Preamp The Same?
In audio signal processing, a preamp is a device that amplifies the low-level signals from a microphone or a line input to a level that other equipment can further process. The gain control in a preamp regulates the amount of amplification provided to the input signal.
When Is Gain Staging The Most Important?
Gain staging is crucial for audio recording and live performances. Whether you're working with pre-recorded audio or recording live, it's important to use proper gain staging to ensure that input and output signals are at the proper levels with minimal distortion. The goal is to achieve optimal signal-to-noise ratios while avoiding clipping or overdriving the signal. By carefully adjusting the gains at each stage of the signal chain, you can achieve a clean and balanced sound that accurately represents the source material.
What Is The Difference In Analog And Digital Gain Staging?
While digital and analog gain staging share a common origin, they differ significantly in their approach.
Analog equipment has certain physical limitations that cause distortion when a signal reaches a certain level. Although small amounts of distortion may sound pleasing, it's important to keep them in check when adjusting the level of analog processors.
To do this, you must ensure enough headroom, which is the space between the maximum level before distortion and the actual signal level.
By leaving enough headroom, you can avoid unwanted distortion and achieve a cleaner sound, although some prefer the added harmonics introduced by analog components being pushed past their optimum point.
In digital audio, there is a maximum limit known as 0 dBFS. Once a waveform crosses this threshold, the signal becomes heavily distorted, resulting in a squared-off waveform. Although some audio engineers may prefer to use this distortion effect occasionally, it is generally avoided by most people.
Despite the availability of digital floating-point processing, the artifacts that emerge from exceeding the threshold are less desirable than the analog counterpart.
Therefore, it is recommended to exercise caution while working with digital gain staging, especially concerning the upper limit of gain.
Contributors:
Jerry Borillo - Illustrator


