How to Clean a Guitar - No-Nonsense Advice

A good cleaning restores a guitar's appearance and ensures it functions at its best.
But improper cleaning and the use of strong chemicals can do more harm than good.
So if you value your instrument, you should know how to clean a guitar properly.
Guitars are prone to dust, grime, and sweat buildup. All of which can negatively impact your guitar playing experience.
Cleaning your guitar isn't just about keeping it shiny and new. Proper cleaning is essential to maintaining its playability, longevity, and sound quality.
In this guide, I'll walk you through a no-nonsense approach to cleaning your guitar.
Before we go into the cleaning process, let's look at the root of the problem.
How Does A Guitar Get Dirty?
Whether you love playing electric guitars or you prefer an acoustic guitar, your instrument will naturally get dirty over time.
There are myriad of ways for your guitar to get dirt. Oil and grime from dirty fingers can leave unsightly smudges on the finish. Dirty arms can leave marks on the lower bout. Sweat stains can also cause discoloration, especially when left on the Guitar's Finish for too long.
The following are the prevalent factors that contribute to the buildup of dirt on your guitar.
1. Dust
If you don't keep your instrument in a case, then dust can quickly settle on the surface.
Though tiny, dust particles are physical objects, so they can cause tiny scratches. When they bundle up, they can even cause obvious scrapes on the finish and wood surface.
More dust can be accumulated when you leave your guitar without a case for long periods.
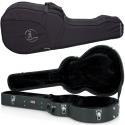
So to prevent dust build-up, it's best to keep your guitar stored inside a case when not in use.
2. Dirt, Sweat, and Grime
Your guitar attracts minor traces of grime and dirt each time you touch it. Even more so if you touch it with dirty, sweaty, or oily hands.
So whenever possible, clean your hands first before grabbing your precious guitar.
You can trace all the things that make a dirty guitar usually a include your arms, legs (dirty jeans), and body (shirt).
The mix of water and salt can damage the guitar body, impacting its appearance and durability.
And when left to accumulate, sweat can also damage your instrument's electronic components, leading to rust.
This is the main reason why I warn my students against lending their instruments for long periods. The borrower may not care enough about the instrument to keep it free from grime.
The harsh truth is that there's no way to fully protect your guitar from dirt, sweat, and grime. But their effect can be minimized by not allowing them to accumulate.
I recommend keeping a clean microfiber cloth handy when you play, especially in gigs where sweat is unavoidable. This way, you can gently wipe dirty parts before you store your guitar back in its case.
The Best Ways To Prepare Your Guitar For Cleaning
Whether you are a professional guitarist or play mostly at home, your guitar will eventually need cleaning.
With a little bit of elbow grease and a clean, lint-free cloth, cleaning a guitar only takes a few minutes.
Generally, this cleaning process works for both an acoustic guitar and an electric guitar.
Step 1: Gather Your Cleaning Materials
There isn't much you need in order to put some shine back into your guitar. One of the most important things is a clean, dry cloth, preferably those with plush textures.
You can also use a sock or a T-shirt but make sure that they are clean and dust free. For better results, invest in quality microfiber cloths.
Depending on how dirty your guitar is, you may also need some water and a guitar cleaner. While some guitarists also recommend fine steel wool, I wouldn't risk any scratches to the finish. If grime is so bad, fine steel wool can be a good last resort. Just remember that you'll need a masking tape to cover pickups from attracting small steel particles.
If you haven't cleaned your instrument in a while, a few dabs of white distilled vinegar can help in dealing with thick grime.
But don't be tempted to apply strong cleaning chemicals and other cleaning supplies. They can discolor or damage your guitar's finish.
For the final polish after the cleaning, you will need some guitar polish with carnauba wax.
Just a quick word on cleaning vintage guitars. Any guitars that don't have a nitro finish can develop a patina over time, and they can change their color.
While this is part of the guitar's natural aging process, you must avoid using polish to keep its original finish intact.
That is why I would recommend using only a dry microfiber cloth (or lightly damp) to clean your vintage guitar.
Step 2: Remove The Strings
For deep cleaning of the fretboard, you need to remove the strings and any hardware that might be in the way.
Keep in mind that removing all strings at once can affect the action, the bridge, and even the neck setup in some older guitars that are over a decade old. As an alternative, you can change individual strings one at a time.
If you never cleaned your guitar before, then make sure that you remove a few strings at a time to ensure the neck tension of your guitar stays consistent.
Getting all the strings out of the way can make cleaning the headstock much easier.
Step 3: Clean The Guitar Fretboard
The fretboard is one of the most handled parts of your guitar, so it needs frequent cleaning.
It attracts a lot of dust and ends up with plenty of natural oils and sweat. These can accumulate on the wood causing damage, so you want to make sure that you remove all this grime.
Take a lightly damp cloth and wipe your fretboard with it. Make sure that you wring out the cloth as often as possible, as you don't want to leave any water on the surface.
Cleaning Ebony Or Rosewood Fretboards
Rosewood and ebony fretboards are relatively resilient, and they don't show marks very quickly. This being said, these types of fretboards still need regular cleaning.
You can clean these fretboards by wiping over the surface with a clean cloth. Use circular movement to get rid of all the debris without causing damage to the frets.
I am aware that some guitarists swear by lemon oil for the cleaning process, but I found that a basic, damp cloth is just as good.
Once you are done with the cleaning, you can get some fretboard conditioner and apply it to the fret surface.
Cleaning Maple Fretboards
A maple fretboard typically shows marks and dirt instantly because of its lighter wood color. This means that you will need to clean the fingerboard more often.
If you have an unfinished maple fingerboard, then use a slightly damp cloth to wipe it down. You shouldn't use any other products on the fret to avoid any damage.
Lacquered maple fretboards are best cleaned with a lint-free cloth (either dry or damp). Again, I would not recommend using lemon oil or steel wool as this can dull the guitar's finish.
Step 4: Clean The Body Of Your Guitar
After you finish cleaning the fretboard, it is time to look at the guitar body.
No matter how careful you are with your instrument, the body of your guitar will inherently accumulate dust and dirt. The longer you leave the cleaning, the more difficult it can be to clean later.
Luckily, the guitar body is easy to clean. You need to consider the finish to ensure that you clean it in the right way.
As a rule of thumb, the most gentle cleaning method for your guitar is a damp, soft cloth that you can wipe over the guitar body in a circular motion.
Gently move up and down the instrument's length and wipe the sides, front and back.
Note that acoustic guitars have a hollow body and a sound hole. So extra care has to be done while wiping.
If the cloth is quickly covered in dirt, you may want to put it in water, quickly clean it and wring it out before you continue cleaning the guitar.
If you find that some spots don't come off when you wipe the surface, then breathe on the area and try wiping again.
Step 5: Clean The Bridge
The bridge is the part located below the soundhole. Usually made of metal, it holds your guitar strings in place.
You can use the same method you work with when you clean the fretboard. Dampen a soft cloth and wipe the bridge down to remove any grime, dirt, and dust.
Try to be as gentle as possible, to not damage any of the small parts. If there are some difficult spots, then you can also use a soft toothbrush.
Step 6: Wipe The Tuning Keys
Even if you don't use your tuning keys very often, giving them a wipe while you are cleaning your guitar is worthwhile.
Use a damp cloth and polish each key individually to make them shine again.
I know some people recommend using a cleaning agent, like glass cleaner. But from personal experience, I found that wiping the tuning keys with a dry cloth does the job just as well, only safer.
Step 7: Polish The Pickups
If you have an electric guitar, you can find the pickups in the middle of your instrument.
While you don't need to clean your pickups with each regular guitar clean, giving them a wipe with a damp cloth is good practice.
If you notice any rust spots on your pickups, you may want to remove them from the guitar and clean them with a special anti-rust agent.
Alternatively, you can also use a white pencil eraser to remove the rust. Just keep in mind that this won't protect the pickups, so you still need a solution to apply a protective film.
Step 8: Polish Your Guitar
Most guitars have a polyurethane or polyester finish that makes your guitar shine. This doesn't just protect the guitar, but it also makes it much easier to clean.
In comparison, a guitar with an absorbent or wood porous finish allows all the grease and grime to soak into the wood. And it's extremely difficult to get these instruments perfectly clean.
For a polyurethane finish, you can use a special guitar polish or wax, such as pure carnauba wax. Apply some wax onto a clean polish cloth and wipe your guitar. Be careful not to apply them directly on the instrument.
This will apply a stain-resistant protective film that will make the guitar stay clean for longer.
It is worth pointing out here that I always avoid typical household cleaners and lemon oil, especially when dealing with older guitars.
While specialist products are more expensive, they are worth the extra cash to protect the finish of an expensive guitar.
What Guitars Not To Polish
There are a few types of guitars that you shouldn't polish as this could cause damage to the finish. These include guitars with a satin finish and vintage guitars.
Step 9: Clean Guitar Hardware
Although I already mentioned some of the hardware bits and how to clean them, I think it is worthwhile talking about them in more detail.
The hardware components of most guitars are made of metals which tend to corrode and rust when they come into contact with skin oils and salty sweat.
The three pieces that are most susceptible to rust are the fret wires, the pickups, the screws on the pickguard, and the bridge.
Most guitarists rest their hands on the bridge, meaning sweat quickly develops in this area.
Even if you have a new guitar, if you are unaware of this potential issue, rust will appear very quickly.
Removing dirt from these parts isn't very difficult, but they are sometimes neglected because dirt buildup is not obvious.
Regularly wiping your guitar hardware will help keep them shiny. Using a guitar polish can help when dealing with persistent stains and smudges.
For a deep clean, you may have to detach the hardware. This allows you to get into every corner.
If you don't want to take your instrument apart, then you can also use a cotton bud to get into the areas that are hard to reach.
Cleaning Rusty Guitar Hardware
If you haven't cleaned your guitar in a while and the hardware is badly rusty or corroded, then it is best to remove these parts from your guitar and give them a thorough clean.
In order to remove any dirt and rust, you can apply some WD-40 with a soft toothbrush.
Just keep in mind that you should remove the components before you work with WD-40. WD-40 and other petroleum products could potentially damage the finish if it ends up on the guitar's surface.
Step 10: Reassemble Your Guitar
Now that you cleaned your guitar, you then put everything back together. This includes any hardware you have detached. and the strings.
Keep in mind that re-assembling hardware on a guitar can be challenging.
If you don't feel confident with removing and putting any hardware back together, then it is best to check in with your local guitar store. But part of being a good guitarist, is learning how to do cleaning and maintenance yourself.
If you want to change your strings, then this is the right time to swap your worn-out strings with a new set.
Once reassembled, your guitar is clean and ready for action.
How To Keep Your Guitar Clean
Even when you regularly clean your guitar, there are a few things you can do to prevent dust and dirt buildup.
Plus, prevention is always the best way to avoid any damage to your instrument.
Here are some tips that help you keep the guitar's body, fretboard, and hardware clean for longer.
Wash Your Hands Before You Play Guitar
One of the simplest things you can do to keep your guitar shining longer is simply washing your hands before picking up your instrument.
This removes any of the oils that might end up on the fretboard or the body of your guitar.
Touching a guitar with greasy hands can leave unsightly smudges and marks. It can also negatively impact the sound, and your overall playing experience.
Washing your hands before you start playing also extends the lifetime of your strings, saving you quite a bit of cash in the long term.
Plus, you don't need to change them too often which gives you more time for your music.
Wipe The Guitar Strings
Guitars strings affect both playability and tone, so keep them as clean as possible.
I regularly wipe my strings after each playing session. Sometimes I use a cleaning lubricant to clean persistent gunk.
Keep Your Guitar In The Case
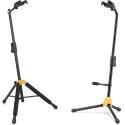
I sometimes display my guitars on stands, just to bask in their beauty and make them easier to grab and play. Sometimes, I even hang them on a wall. But I don't expose my guitar for too long.
They can gather dust, grime and other airborne particles that can damage the guitar's surface. These particles may even end up messign with your hardware and affect sound.
To be safe, store your guitar in its case when not in use for long periods.
Cleaning Your Guitar Regularly
If you have a regular cleaning routine, such as wiping your instrument down after each gig, then you don't have to spend too much time on your deep cleans.
Buy The Right Guitar
While I love all of my guitars, I know now that some are easier to clean than others.
For example, guitars with a polyurethane finish are quick to wipe down, while wood, vintage guitars are incredibly tricky to keep clean.
If you are new to guitars and you want to have an instrument that is easy to clean, then go for guitars with non-porous finish.
Frequently Asked Questions
What Can I Use To Clean My Guitar?
There are many guitar cleaning kits that promise better cleaning. But in reality, all you really need is a clean dry cloth.
For stubborn smudges and marks, you'll need to wipe it with a slightly damp cloth.
What Should I Avoid When Cleaning My Guitar?
It can be tempting to just use everyday household items. But general household cleaning products that contain bleach, lacquer thinner, heavy waxes and silicone can damage your guitar's finish. Avoid them like the plague. Also don't experiment with strong chemicals like lighter fluid.
You should also stay away from paper towels and use a clean cloth instead.
How Often Should I Clean My Guitar?
I would recommend cleaning your guitar with a cloth every week. Do more cleaning depending on how often you use your instrument and how often you take it out to gigs.
As a professional guitarist, you may want to clean your guitar thoroughly at least once a month, or everytime you replace your strings.
Can I Clean My Guitar With Wet Wipes?
No, wet wipes can leave residue and a fragrance on your instrument. Some wet wipes contain strong chemicals that can leave marks or discoloration.
Using a damp, clean cloth to wipe down your guitar is best. For difficult smudges, you can use a gentle guitar cleaning agent.
What Can I Use To Clean My Guitar Strings?
Grime, dirt, and bacteria can accumulate along the crevices of string windings. This is the reason why the strings are usually the nastiest part of a guitar.
You can use guitar specific string cleaning solutions. Or you can use a hand sanitizer. Apply a small amount on a dry cloth and gently wipe your strings.
Take care not to let these drip on the finish. Note that this type of cleaning is not advised on vintage guitars.
Final Thoughts
Keeping your guitar looking shiny and new is not a tall order.
Especially now that you know how to clean a guitar properly, using common sense cleaning methods.
When you combine proper care with consistent cleaning, you can rest assured that you're guitar is always clean and in good working condition.
If you have guitar cleaning related tips and stories, don't hesitate to leave a comment below.


