Vocal Compression: The Secret Sauce To A Great Track

If you are new to mixing vocals, understanding the importance of vocal compression is one of the first things you must learn. In music production, you want vocals to sound the best possible. By knowing your way around a compressor, you can produce clearer, even-sounding, and more defined vocals. This will help enhance your music production quality.
It takes practice to get the most out of your vocal compressor. In this guide, I’ll discuss what vocal compression is and how you can use it.
What Does A Compressor Do?
An audio compressor is a device that affects an audio signal’s dynamic range. It reduces the space between its lowest and highest amplitude peaks. Compressors are also used to avoid spiking or clipping on the highest frequencies of a signal. Decreasing the dynamic range can make vocals sound more consistent in the mix.
This is accomplished by gain reduction. This establishes a threshold that prevents the highest portions of an audio stream from going over. Vocals can be compressed just like any other instrument.
Compressors paradoxically make a track sound louder by limiting the dynamic range. Additionally, they can be utilized to improve the track’s tone, as is the case with analog and vintage compressors.
Why Do You Need To Compress Vocals?
The vocals are one of the most critical aspects of a track. If the vocals don’t sit well in the mix, you can tell straight away.
Compression is helpful if a vocalist isn’t experienced with recording and relies solely on their live singing skills. Controlling the dynamic range of vocals is one of the trickiest components of managing vocals since it depends on the dynamics of the instruments behind it.
The correct amount of compression used in a finished vocal track helps to make the vocals sit better in the mix.
This is a challenging balance to accomplish. Especially when each track requires a different level of compression. Creating a natural-sounding vocal track is the key to achieving proper vocal compression.
Vocal Compression Settings
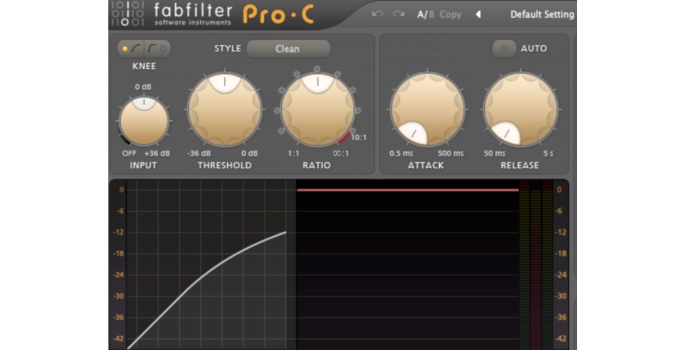
Each compressor will have its unique controls. With that being said, the majority of compressors will all contain these standard controls.
Ratio
Ratio determines how much gain is reduced when a signal exceeds the threshold. For example, a 2:1 ratio means that for every 2dB that exceeds the threshold, the gain will only be louder by 1 dB. If the ratio is 4:1, 4dB beyond the threshold will only increase the volume by 1 dB.
I recommend starting at a 2:1 ratio, but for a more compressed sound, you may want to use a ratio of 3:1 to 6:1. To create a more natural sound, you could use a ratio of 2:1 or 3:1.
Knee
The knee refers to the intensity of compression that is produced.
A hard knee (0.0), which is more immediate, is used for aggressive compression. In contrast, a soft knee (1.0) is used for more subtle compression.
Threshold
The threshold determines when the compressor starts to apply the reduction. The amount of gain reduced past the threshold is usually indicated by a Gain Reduction or GR meter.
Attack
The compressor’s “attack” describes how quickly the compressor kicks in after being prompted by audio that goes past the threshold. Slow attack time can give vocals a punchier, more dynamic sound.
Faster attack times might be more accurate. However, sometimes, a faster attack is much more noticeable by a listener when they listen back to the audio. Hence, it doesn’t always retain its natural sound.
Release
The release setting for compression refers to the amount of time it takes the compressor to return to its resting and original level. Typical release times start at 100ms for vocals. You can opt for a faster release for faster vocal performances or if you feel like the vocal track is “pumping.”
Gain Reduction Meter
The gain reduction meter shows the amount of gain the compressor decreases when exceeding the threshold. This can also show how hard your compressor is working. The compression is stronger when the gain reduction is higher in decibels (dB).
Makeup Gain
This is a volume boost caused by compression to make up for the necessary gain reduction. As a result, this type of gain refers to the signal volume AFTER the compression.
The Genre Of Vocals Affects Compression
It’s crucial to remember that every genre has its own unique set of stylistic requirements. As a result, this will affect how much compression you will apply. Thus, if you are thinking about making music with one of the following genres, I have outlined how to apply vocal compression as a starting point.
While the following are guidelines, you are free to experiment with them. You should use these guidelines just as a framework--like a vocal compression cheat sheet. You can alter how much or little compression you decide to use depending on the dynamics of your track and how the lead vocal behaves.
The following are common types of genres and how compression is used.
R&B And Pop
Both R&B and pop genres favor a clear, polished sound. Singers in this genre are dynamic and expressive. It’s best not to overcompress the signal using a lower ratio of around 2:1, with gain reduction only coming in during louder parts.
Modern pop, like Kpop, however, uses heavy compression to make the vocals punch through dense instrumentals. A ratio of 4:1 with a fast attack and release can help with this. Aim for -6dB of gain reduction.
Jazz
It’s crucial to keep the vocal as close to its live-sounding source in jazz music. So natural sounding compression settings is enough. If you want to maintain the energy of the initial recording, you should limit dynamic control to a minimum. Additionally, there aren’t many effects used for these recordings.
Thus, it is one of the more organic and natural genres, as very little is done to the vocals to make them sound good. A ratio of 2:1 with the threshold set to catch peaks is enough.
Rock/Heavy Metal
Rock vocals are usually heavily compressed, more than pop vocals. This is because they are placed further into the mix. The instrumentals are usually mixed to be punchy and impactful, with aggressive vocals taking a back seat. It’s best to err on the side of overcompression to keep the vocals from getting lost in the mix. A ratio of 3:1 to 4.5:1 is excellent here, with gain reduction exceeding -10dB. Set your threshold accordingly.
Electronic Music
Electronic Music (EDM) is similar to R&B and pop regarding compression. Again, the denser the instrument, the more compression you must use. A 4:1 ratio with a fast attack and release would be best for modern electronic music. Compressing vocals this way evens it for better interaction with effects like reverb, delay, and pitch shifting.
Lead Vocals Vs. Background Vocals
For lead vocals, the idea of compression is to help produce a consistent sound that fits when mixing vocals.
However, you will need to have a different stance regarding background vocals. Backing vocals might be more tightly compressed because they are intended to be pushed further into the back of the mix. Higher compression settings aid in the backing vocals correctly blending and uniting with the rest of the vocal mix.
Setting Up Your Vocal Compressor
Whether you are using a plugin or an actual compressor hardware, the steps you must follow to set up and compress vocals are the same.
In this section, I will walk you through how you can set up and use a compressor.
Step 1: Vocal Compressor Settings
Set your starting ratio. I recommend starting at 2:1 or 3:1. Set attack and release to their fastest possible speeds (1 millisecond) and knee to 1.0. The threshold should be set at 0 dB. Finally, the makeup gain should be set to 0 dB.
There should be no gain reduction yet with these settings. If there is, check your gain staging before the compressor. Your track might already be clipping.
Regardless of the vocal performance’s genre or style, you should always begin with the quickest attack and release times. They are used to modify the waveform. However, you can always tweak these thresholds later on.
Step 2: Engage The Compressor
By decreasing the threshold, we can now activate the compressor. Whether you performed proper gain staging during recording will determine how far you can lower the threshold. Your track’s volume should be about -18 dB on average.
Lower the threshold gradually while keeping an eye on the gain reduction meter until it reaches about -5 dB. This will imply that most peaks above the threshold will be reduced by about 5 dB.
Gain reduction is a more important figure right now. Once you have the right gain, you can start looking at the other settings.
Step 3: Modify Your Ratio
The ratio will determine how hard your tracks will be compressed beyond the threshold. This will vary depending on the program material being played.
Natural compression is an excellent place to start. This will have a lower ratio and emphasize the attack and release. Slower vocal performances, such as jazz, love ballads, classical tunes, etc., would fall under this category.
A higher ratio would be used for modern pop, rock, and electronic music. These mixes are denser, and the vocals must be as consistent as possible.
Start with a 5:1 ratio for dynamic compression and experiment going higher, possibly to an 8:1 ratio.
Step 4: Include More Gain
The gain reduction will rise as the threshold falls into the track’s average levels. Thus, you’ll need the makeup gain to recover the amount of gain that is lost.
Your audio will be considered louder overall when you lower the peak volume after the lost gain has been recovered. The RMS (root-mean-square) value of the track determines how loud something is perceived. By compressing, you raise this average while also lowering the entire volume.
If the gain reduction gauge shows a value of roughly -6 dB, use the makeup gain dial to add back +6 dB. Even though volume and gain are not the same, you might think of it as regaining the volume you’ve lost.
The goal is to raise the audio volume to the proper levels. As you adjust the compression settings, you may return to this makeup gain level. This will help you to control the volume throughout the entire mix.
Step 5: Listen To The Vocals
Listen to see how the vocals sound in the overall mix.
Too Compressed - You can tell whether your vocals seem too compressed once you listen to the track. Sometimes, it comes in the form of pumping. Other times, you hear different parts of the vocals, such as breaths becoming too loud. If this is the case, start by adjusting the ratio or backing off the threshold.
I suggest having a light compression at this point. Having too little is preferable to having too much.
Too Loud - If certain areas are still overly loud compared to the quieter ones, you have a few options. Although you can lower the threshold slightly, you should raise your ratio instead. Or, try doing a mixture of the two.
To achieve harmony before the compressor activates, you likely need to return to the first track and generate a gain plugin track. This is only required if the audio sounds entirely out of place.
Step 6: Adjust Your Attack And Release
Once you reach this stage, your vocals should be at the right volume and compressed to the correct amount as well. Now, you can think about the attack and release settings.
Your attack and release settings will vary depending on the genre of music you are making. For example, if your vocals feature rap or other fast vocal performances, you will need a fast attack. You can play around with the attack and release. Although, I’d suggest you stay between 5 and 10 milliseconds. Any lower might introduce crackling or artifacts. For the release, aim for around 70 to 100ms. Listen for any pumping or unnatural volume changes.
Slow Vocals - When working with slow vocals, you may use a slower release. You can play with the slow attack until you reach your desired effect.
Using a slow attack preserves the dynamics of slower vocals. Using fast attack and release on ballads lowers and restores the gain too quickly, resulting in pumping artifacts.
You must time the attack and release depending on the length of the syllables used. Otherwise, you will find that the compressor will start compressing in the middle of a word or phrase.
Step 7: What Knee Do You Need?
The higher you set your knee at, which is often a maximum of around 1.0, the smoother the vocals will sound. A lower setting (at least 0.0) will result in no smoothness and a more abrupt start to the compression.
A higher knee is better if you need more gradual compression. For rap parts, 0 knee is alright. Furthermore, it is better to slowly increase the knee through the audio.
Step 8: Finish
Once you have done this, your vocals should sound more consistent with the levels. From here, Check if your vocals fit in the mix better, then make more minor adjustments.
Different Uses Of Vocal Compression
A compressor plugin has many uses. It is always good to remember these types of compression while you are mixing.
Compressors affect your track in these ways:
Dynamic
The primary purpose of dynamic compression is to balance out the gain of the entire audio source. Additionally, this type of compression raises the lower portions of the entire vocal. While also lowering the peaks of the loudest parts of the powerful vocals.
The goal of dynamic compression is to produce an audio track that is more fluid and smooth.
Tone
While still offering gain reduction and more stable dynamics, many compressors have unique tonal qualities. Analog compressors can enhance a vocal’s warmth and presence. This enables the audio to sound natural in a mix.
These include more specific compressors, like VCA or tube compression, that add character aside from altering the dynamics of a track.
Voltage-controlled amplifier compressors, or VCA compressors, affect the dynamic range by modulating the voltage the signal produces going through them. These precise compressors contain settings that allow you to choose whether to apply the gain reduction to an input audio stream.
The VCA compressor helps you to produce a cleaner and clearer sound. While also without adding too much color to the audio. Examples of these include the DBX 160 and SSL G-series compressors.
Tube compression is used to provide your mix and audio with warmth. This effect results from a little second-degree harmonic distortion in the compressor’s final gain circuit.
Many producers still use tube compressors to create their distinctive sounds.
What Compression Plugins Can You Use?
There are various compression plugins aside from the standard that you can use to help you with your vocal compression process. The use of multiple compressors with different uses is a common practice in music production. Here are some of the most common variations you may encounter in your music production journey.
De-Esser
A de-esser is a unique compressor focusing on harsh frequencies, mainly between 4 and 10 kHz. The term “sibilance” refers to primarily “S,” “T,” or “P” noises. A pop shield on your microphone can help to reduce these sounds.
Every time this predetermined frequency range goes beyond the threshold, the compressor clamps down, lowering sibilance.
Thus, these sounds become much less noticeable, and the vocals won’t sound as harsh.
Parallel
A compressed audio stream is mixed in real time with an uncompressed audio signal in a technique known as parallel compression. This sort of compression naturally keeps the energy of the original vocals. Yet, it also presents you with a more polished, consistent sound by bringing up the softer parts of the performance.
Multiband
Multiband compression is a more specialized kind of compression. This type of compression affects specific frequency ranges. It lets you manipulate how much tonal compression each frequency has.
Multiband compression is best used to control low-frequency buildup for added clarity in the mix, as well as taming high frequencies that might sound a bit harsh.
Side Chain
Ducking is another name for side chain compression, which reduces audio based on the input level of a chosen track. This is helpful for various sounds with conflicting frequencies or as an effect.
For example, a kick snare and bass have low frequencies, which can easily get mixed up. You can set up sidechain compression to compress the bass track whenever the kick exceeds the threshold.
Limiter
A limiter is a compressor with a very high or even infinite ratio. Using a limiter on vocals should be done subtly. It should only start to reduce the gain at extreme levels.
Glue
Glue compression is a perfect fit for backup vocals or several vocal tracks. This compression works to “glue” many sounds together with dynamic control and harmonics. However, you can still use this compressor for a single instrument or vocal track.
Furthermore, glue compression can augment the tonality of your vocal tracks by adding warmth.
Issues With Using Vocal Compression
Vocal compression has its own set of issues. It emphasizes vocal sibilance, raises background noise, and makes the singer’s breaths more prominent. It can also negatively impact other vocal effects.
To help with this, the vocals can be managed by adjusting the release setting to be slower. However, you can also address these issues by using a de-esser. It’s a type of compressor that focuses on harsh high-frequency bursts of energy from consonants like “S” and “Sh.”
Having more than one compressor perform the heavy lifting can be more effective than utilizing just one. Divide the compression between two compressors in series, with the first reducing the signal by about -6 dB at the peaks with a fast attack and release.
Then, with the second compressor, you can apply a softer compression of -2 to -3 dB with a slower release. This then creates a more organic and natural sound.
Refer to our best vocal effects pedal article to see our top recommendations.
Conclusion
Compression is important for vocals as it helps a vocal performance to blend into a track. Since vocals can differ in quality in recording, getting the levels consistent is a great way to start the mixing process. Vocal compression can take some practice, but the effort pays off in the long run.
Frequently Asked Questions
How Do You Know If Your Vocals Need to be Compressed?
If your vocals are already compressed too much, then they will sound unnatural and relatively flat. They won’t have that “live” feeling you often get with vocals. If you get vocals that went through a vocal chain, you might not need to do any additional compression.
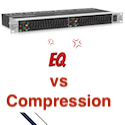
Which Should You Do First: Compressor Or EQ?
This depends on whether the raw vocals have percussive low frequencies. If there are many plosives or if you want the compressor to reduce the gain by focusing on the midrange and higher, a filter before the compressor is recommended.
Does Compression Make Vocals Sound Loud?
Vocal compression will make the vocals louder at a more consistent level. If a vocal track has been compressed, you may need to adjust the makeup gain to get it back to a level that fits into your mix.
Contributors:
Allen Articulo - Editing
Jerry Borillo - Illustrator