How to Reduce Background Noise on Mic? Our Top Tips
We've all been there before. After a good recording session, you begin mixing the song and notice an odd static noise in the last chorus.
Your stomach drops, and you ask yourself, "Should I rerecord the last chorus or edit it out in the mix?"
Background noise can negatively affect the quality of a recording. In this guide, I offer you some solutions on how to reduce background noise on mic.
I will provide some tips to prevent background noise during recording and suggest software solutions to help eliminate any existing noise. If you want to improve your sound quality by reducing or removing background sounds, you've come to the right place.
Table of Contents
Types Of Unwanted Noise
Understanding the various types of background noises is crucial to remove them effectively. By identifying the type of sound, you can troubleshoot the issue more efficiently. Below, you will find a list of unwanted noises and sounds that can negatively impact the quality of your audio.
Irregular Noise
Intermittent noise can be unwanted sounds, such as rain, thunder, traffic, wind, or human voice. TV noise picked up by the mic can also contribute to irregular noise.
Broadband Noise
Broadband noise is a consistent sound that covers a wide range of frequencies. It can be identified by its hissing, buzzing, or humming sounds that occur at regular intervals.
Narrow Band Noise
Narrow band noise refers to a continuous sound or noise with a limited frequency range, like the sound of RF interference in cables or a running computer.
Impulse Noise
Impulse noises like clicks and pops occur at higher frequencies, while bumps cover lower-frequency impulse noise.
How To Reduce Background Noise On Mic
Both pre and post-production steps are necessary to reduce microphone background noise. This section will cover both steps.
1. Good Pre-Recording Practices
It's important to take preventative measures to reduce background noise before recording. You should always check your environment before pressing the record button. Removing ambient sound can be as easy as turning off the air conditioning or TV.
Recording in a quiet environment is always the best option, as it reduces the chances of ambient sounds ruining your recording. Choose the quietest room available to record in. This will save you money on audio and noise-canceling equipment/software.
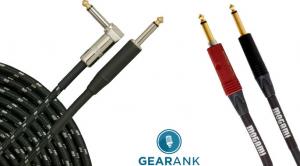
Sometimes, the issue might be related to faulty cables, bad signal routing, or ground that exacerbates background noises. Here are some steps to isolate the issue on a simple setup.
Setup: Audio Technica AT2020 Mic > Focusrite 2i4 > USB-C Cable > Mac or PC
-
Check all connections for faults and switch between inputs to test for interface issues. If unwanted background noise persists, try using a different cable.
-
Try using a different USB-C cable or port if your device doesn't connect.
-
If the above steps do not work, try plugging your Mac or PC into a different outlet. Determine whether the buzzing is caused by the ground or the microphone itself.
If you are experiencing static noise from your plugs, one way to resolve this issue is to use a ground lift adapter. This will help ensure you have a cleaner electrical source, which is essential for achieving high-quality audio. When it comes to dynamic signal processing, increasing the gain should not significantly impact the noise floor. However, compressors may increase the floor noise and reduce the dynamic range.
Unfortunately, some microphones have components that can compromise the signal quality. If you want a condenser microphone with a high signal-to-noise ratio, consider investing in one of the best condenser microphones available.
Optional: If you are experiencing background noise while using headphones, it could be due to loose headphone noise plugs or a faulty headphone jack. To address this issue, ensure your headphone plugs are correctly and firmly inserted, and do the same for all microphone inputs.
To avoid confusion, performing these steps systematically rather than all at once is recommended. This approach will help you pinpoint the exact point of failure. Additionally, you can use the same method to troubleshoot more complex audio hardware setups.
2. Buy Quality Accessories
When setting up your microphone, choosing a sturdy microphone stand is important. This is often overlooked, but using a stand that loosens up over time can negatively affect sound quality. You can also use a shock-mount mic clip to improve audio quality further. The elastic bands around the shock mount will prevent the microphone from picking up any unwanted creaking or bumps.
Another highly recommended accessory is a pop filter, which helps to block out excessive plosive sounds. A pop filter will help mitigate against excess consonants like the 'p,' 't,' and 's' sounds.
3. Switch to a Dynamic Mic
A dynamic microphone may be a better option if you are in a noisy environment. Compared to condenser microphones, dynamic mics are less sensitive to frequencies. They are available in different variations of cardioid polar patterns, which are known to reject signals from the sides and the rear. For outdoor recording, there are accessories that can turn your mic into a noise canceling microphone.
3. Check Mic Distance and Gain Levels
When using a microphone, it's important to position yourself about 3-5 inches away. If you're too close, you may create plosive sounds and mouth noise that the microphone can pick up. The microphone may capture too much background noise if you're too far. You need to find the appropriate distance from the microphone to achieve the proper speech-to-noise ratio. This rule also applies when recording instruments.
Another tip is to keep a close eye on your gain levels. As the audio signal passes through gain stages, it becomes louder. When the gain is set too high, it can distort the audio and reduce quality. This issue is especially pronounced in poorly treated acoustic environments, so minimizing background noise whenever possible is important.
Software Tools To Reduce Background Noise?
Producers often encounter situations without control over the recording venue and must deal with poor acoustic treatment. However, noise reduction software such as Izotope RX, Audacity, and Acon Digital Acoustica can help achieve a cleaner sound.
It's important to understand that noise reduction, background noise suppression, and noise-canceling aim to achieve the same result but use different algorithms.
In this context, we will focus only on noise reduction software in a studio recording environment. I will use Izotope RX with Logic Pro as a software tool for demonstration purposes.
Setting Up Izotope RX in Logic
-
From your Logic Pro software, press Command + (,) to open Logic's Preferences.
-
Go to Audio > File Editor.
-
In the External Sample Editor, locate Izotope RX. Close the preferences window.
After successfully setting up RX, you can easily open it by highlighting an audio file and pressing Shift + W. This feature is compatible with any DAW, be it Ableton, Pro Tools, or FL Studio. However, you must determine how to route RX to your preferred DAW.
Method 1: Noise Reduction With RX
It's important to identify its type before trying to clean up any noise. Is it an irregular noise, a narrow band noise, or a broadband noise? Also, determine if the noise occurred just once or multiple times. This information will help you decide the best approach to clean up the noise, whether at once or at a time. For instance, you may need a vocal cleanup if you're dealing with vocal recordings.
If you decide to do an all-at-once noise reduction, here's what you need to do:
-
Click on the whole audio track, then press Shift + W. Wait for Izotope RX to load the audio file.
-
On RX, go to the right corner of the screen and select "Voice De-noise."
-
From the De-noise window, press "learn" so the plug-in can assess the noise profile.
-
Adjust the threshold and reduction settings to control signal and noise separation. Higher thresholds include noise and low-level signals, while reduction controls the amount of attenuation.
-
Select "Preview" to listen to the signal. Dial both parameters to get the desired effect.
-
Press "render" to remove background noise. Then, Option+Command+S to overwrite the audio file in Logic Pro.
In the case where you want to edit the signal one at a time in Logic Pro:
-
Go to the part of the audio that has the clicks, bumps, or any impulse noise.
-
Press "T" then select the Scissors Tool. Cut the section that needs to be edited.
-
Press Shift + W. Inside RX, open "De-click."
-
Play around with the sensitivity settings to get the desired result. Select Preview to listen to the effect.
-
Press "Render". Then, Option+Command+S to overwrite the audio file in Logic Pro.
You can follow the steps above for acoustic echo cancellation and choose "De-Reverb" in RX. De-Reverb has several options for controlling how much reduction is applied per band.
Method 2: Enable The Noise Suppression Option In Windows 10
This method involves some experimentation and should be considered a last resort. Windows 10 and Mac come with built-in ambient noise reduction designed to fix background noise in calls and live streaming quickly. However, Izotope RX and Audacity are more effective at suppressing intermittent background noise, giving you greater control.
Most noise cancellation and echo cancellation features in calls are unsuitable for music production. Windows 10's noise suppression options do not allow you to adjust the sound behavior.
When you suppress intermittent background noise with Windows 10, there's always the risk of altering the sound quality of the track. Nevertheless, this type of background noise suppression is worth trying as long as the processed audio's sound quality is not significantly different from the original.
On Windows 10
-
Use the Control Panel on Windows and choose "Sound."
-
Then, head to the Recording Tab and properties, where you can alter the settings on your microphone.
-
You can use a microphone boost or adjust the microphone volume level. Once you have made those adjustments, choose 'Enhancements' and 'Noise Suppression'.
For future reference, comparing recordings made with background noise and those made with ambient noise reduction can be helpful. However, be aware that Windows 10's ambient noise reduction feature may cause a loss in sound quality, particularly in specific frequencies.
If given the choice, recording in an environment with minimal background noises is still better, even if it requires additional effort and processing to reduce any noise and unwanted sounds.
Final Thoughts
Prevention is always better than cure, even when reducing background noise on a mic. You can take various measures to reduce ambient noise, such as checking your audio hardware connections, purchasing pop filters, and setting up cables correctly. This way, you can ensure that your audio recordings are high quality and free from unwanted noise.
However, unexpected noise may sometimes occur, and you need to think quickly in such situations. Knowing when and how to reduce background noise on mic is always a good skill to have. That's where noise canceling software comes in handy. You can use proprietary software like RX and Audacity to remove background noise from your recordings. To a limited degree, Windows' built-in noise cancellation is a decent but less-than-ideal compromise.
Contributors:
- Raphael Pulgar - Editor / Co-writer
- Jerry Borillo - Illustrator


