What is an IR and How To Make Impulse Responses
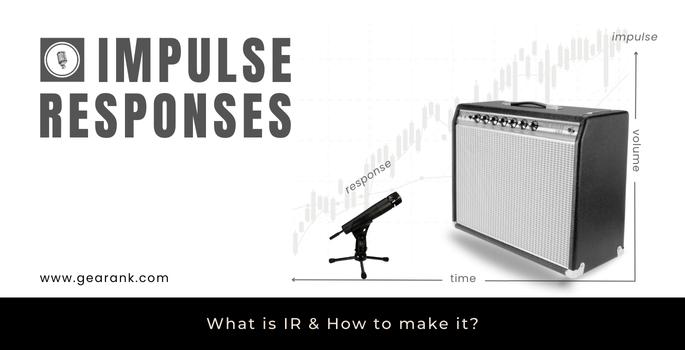
In audio engineering, Impulse Responses (IRs) are among the most effective tools for producing high-quality reverberation effects.
So, to improve your sound, you ought to know the answer to the question - what is an IR? In this article, I will share the details behind IRs, their use, and their creation.
Impulse Responses are designed to recreate the acoustic characteristics of a specific environment, such as a concert hall or recording studio, and can add depth and dimension to recorded sound.
They are also commonly used in guitar amplifier cabinet recording, where they serve as a substitute for miking up a cabinet, allowing engineers to capture the sound of an amplifier without the need for a physical microphone. The sound quality of these IR cabs depends on how well they were captured.
Due to their versatility and effectiveness, using and creating impulse responses have recently become increasingly popular and are widely adopted in the audio engineering community for both musical and sound design applications.
Before we go into how to make impulse responses, let us discuss what impulse responses are.
What Is An IR (Impulse Response)?
An impulse response is a time-domain representation of a system's response to a short, sharp signal. It captures both the frequency and temporal behavior of the system, including the way it shapes the sound and how it evolves as it decays.
The frequency response of a system is affected not only by the speaker cabinet or space but also by the microphone used and its position. Impulse responses provide a way to measure the system's linear characteristics but do not account for non-linearities such as compression or distortion. While distortion modifies the frequency response, it cannot be replicated by an impulse response.
Now that we've answered the question "What is an Impulse Response" - we can proceed to the next topic.
How Do Impulse Responses Work?
An impulse response is a digital reflection of the acoustic characteristics of a particular space or cabinet. It is a recording of the room or equipment before generating sound.
Imagine clapping your hands in your kitchen and living room to understand this concept better. The clap is the impulse, and the sound you hear within the space is the response. However, the sound will differ in each room due to the acoustic properties of the space.
In the case of amplifier cabinet impulse responses, they operate on a comparable principle. Instead of measuring the space's acoustic properties, the impulse response function is to measure the speaker movement and frequency response, particularly for close-miked cabinets.
Why Create Impulse Responses?
Before we get into the whole how to make an IR discussion, we should answer this important why question.
Impulse responses are a powerful tool that can be used for various purposes in audio engineering, from capturing the sound of the space to producing convincing amp simulations. By recording the acoustic properties of a space and applying them to other tracks in a mix, it's possible to create a cohesive and immersive sound consistent across all production elements. This technique is beneficial for sound design, where it can help to situate sounds properly and make them congruent with the visuals.
In recent years, impulse responses have also become popular to capture the sound of guitar and bass amplifier cabinets and speakers. Applying a cabinet impulse into a VST amp sim makes achieving a convincingly natural tone indistinguishable from a miked-up amplifier possible. This has been made possible by the significant improvements in amp simulations over the years, allowing for the development of high-quality impulse responses that accurately capture the sound of real-world equipment.
Impulse responses are also used extensively in live sound applications, allowing guitarists and bassists to achieve a miked-up sound without needing physical microphones. Multi-effects units with an onboard guitar IR loader like the Fractal Audio Axe-Fx and Line 6 Helix, use impulse responses to produce their tones live and in the studio, making it easier to achieve professional-quality results in various settings.
What Is Convolution?
Convolution is a technique used in digital signal processing to modify the characteristics of one sound by using the sonic qualities of another sound.
While some may be familiar with the principles of FM synthesis, which involves using the sound of one oscillator to modulate the sound of another oscillator, convolution does not use oscillating waveforms.
Instead, it utilizes two audio sources: the first is the input signal, the sound that is to be modified, and the second is the impulse response, which contains the sonic characteristics of a specific space or object that we want to apply to the input signal.
By convolving these two sources, we can create a new sound that combines the input signal's original qualities with the impulse response's characteristics sonically.
Compared to using a matching EQ, convolution takes the factor of time into account as a sound decays. This interaction between two elements are the central idea around convolution.
This works for both cabinet IRs and convolution reverbs, as both carry information about how the frequency response of a sound changes and decays over time.
How To Make Impulse Responses
There are many free impulse responses (IRs) that you can find on the internet. You can use these to simulate the sound of various speaker cabinets.
However, creating your own IRs can be a bit of a challenge. In order to make a cabinet impulse response, you will need some specific tools.
First, you'll need a way to generate test signals that you can play through your speaker cabinet. And don't forget to do a speaker test prior to making your impulse response.
This can be done using software like REW (Room EQ Wizard) or a hardware device like the Dayton Audio OmniMic V2. You'll also need a microphone to capture the sound of the test signals as they play through the cabinet.
A popular microphone for this purpose is the Shure SM57.
Finally, you'll need impulse response guitar amp simulators and similar software to analyze the captured audio and generate the impulse response. There are many options for this, including REW, IR Utility (Logic Pro), Voxengo Deconvolver, and Waves IR-L Convolution Reverb. Once you have all of these tools, you can start creating your own custom impulse responses to use in your music production or live sound setups.
To recap, here are the things you will need:
-
An amplifier and cab of choice
-
Microphone(s) to record the impulse
-
A DAW or hardware with a way to make a test signal
-
Audio Interface
-
A deconvolution plug-in like Voxengo Deconvolver or Studio One's IR Maker
-
An IR Loader.
To capture an impulse response (IR) of a room or space, you'll need similar equipment to what you would use for recording. However, you'll require a signal generator or a reasonably accurate monitor speaker with a flat response.
Begin by placing your microphone at the desired location. If you're recording a guitar amplifier, mic up the cab as usual. Place the microphone away from the sound source to capture an IR of a room.
Connect your microphone to the interface; if you're using a condenser microphone, you may require phantom power.
Next, connect the output of your interface to the effects return of your amplifier or the input of your monitor speaker.
Once everything is set up, there are two ways to capture an impulse response: a Sine Sweep or a short burst of white noise.
The Sine Sweep Method
The Sine Sweep Method uses a pass of a sine wave from the lowest frequency to the highest. Then, processing the sweep with an impulse response utility called a deconvolver.
-
Initialize your Digital Audio Workstation (DAW) and initiate a new project.
-
Create two mono audio tracks and load a sine sweep onto one. It's worth noting that certain DAWs, such as REAPER, come with sine sweeps pre-loaded. However, you may find it necessary to render the sweep as a new WAV file for this specific project.
-
After loading the sine wave, it is important to disable or disarm the record input. This step will prevent the track from being overwritten with the capture from the microphone.
-
To begin recording, enable the second audio track and initiate the recording process. Allow the sweep to play in its entirety for accurate results.
-
To ensure that the end of the sine wave is not truncated, we recommend stopping the recording a couple of seconds after the sweep ends. After that, we suggest rendering the recording as a .WAV file to preserve its high-quality format.
-
To deconvolve a recorded sine wave sweep, load it into a suitable plugin and initiate the processing.
-
Once the audio signal has been processed, a new file in the .WAV format is generated, representing the impulse response. This response is expected to sound like a brief click upon playback, considered standard behavior.
It can be a complicated process, but this ensures that all the frequencies are represented accurately
Having the entire frequency range represented is ideal for impulse responses that need all the resonance captured. This may be a disadvantage if the room being captured has a lot of room modes that may skew the IR with excess resonance.
The White Noise Burst Method
This technique offers a quicker alternative to achieve the desired result without needing a deconvolution plugin. While most DAWs have an in-built white noise generator, if that's not the case with yours, you can download a high-quality white noise .WAV file from the internet and import it into your DAW.
-
Similar to the sine sweep method, follow steps 1 to 3 explained above, but instead of using a sine sweep, import the white noise track. Ensure that the track is disarmed for recording as well.
-
Reduce the length of the noise to the lowest possible level such that it is only one sample in duration. You may need to zoom in to cut it precisely.
-
Initiate the recording a few seconds before the noise and allow a few seconds of silence after it subsides.
-
Normalize Audio or Audio Normalization. Normalization ensures consistent volume and removes unwanted noise.
-
Render as a .WAV file.
How To Test Your Impulse Responses
To test cabinet impulse responses, you can load them onto an impulse response guitar amp simulator VST or save them onto an effects unit of your choice.
When done correctly, the output should closely resemble the amp that you recorded initially with.
As for reverbs, you can quickly load the impulse response onto a convolution reverb.
Now that you know how to make an IR, the answer to the question "What are impulse responses", becomes much clearer
Why Are Impulse Responses Useful
Recording Impulse Responses (IRs) have become popular in modern audio engineering, primarily due to their convenience.
While some argue that recording guitar cabinets traditionally produces better sound quality, the consistency of tone that IRs offer across different songs in an album outweighs the benefits of non-stop guitar recording.
Moreover, convolution reverb plugins use IRs to capture the acoustic characteristics of a space, allowing one to recreate a track's sound in that space.
This feature is helpful for bands, foley, ADR, and voiceover work in audiovisual media. It is essential to fit audio to visuals accurately to achieve high-quality output.
Waves, a plugin company, has incorporated the acoustic characteristics of legendary studios such as Abbey Road Studios and Ocean Way Studios into their NX series plugins. The technology used in this series is based on impulse responses, and the plugins are designed to recreate the sound of these spaces accurately.
While the exact technical details are not fully disclosed, it is safe to say that an accurate impulse response file is used to recreate the unique acoustic fingerprint of these studios, which is then applied to the audio signal to simulate the same environment.
Some IR software allow you to be a virtual space designer by tweaking parameters. Many guitar amp simulators and the best delay reverb pedal processors also come with IR functionality.
Final Thoughts
So, what is an IR? An Impulse Response lets you add depth, dimension, and realism to your instruments and musical tracks.
By creating impulse response files and loading them into a convolution reverb plugin or a digital amplifier modeler, users can achieve realistic and high-quality guitar tones and reverb effects, even if they don't have access to the playback and recording devices that were used to make them.
In recent years, impulse responses (IRs) have gained immense popularity among audio engineers, music producers, and guitar players. They use these digital audio files to capture the acoustic characteristics of a particular physical space, instrument, or amplifier, enabling the user to apply that sound to their recordings or live performances.
Although creating your own impulse response may be challenging, understanding their creation and application can significantly enhance one's ability to craft professional-sounding recordings and live shows.
Frequently Asked Questions
What Is The WAV Format For An Impulse Response?
The WAV audio file format is the preferred choice for capturing IRs, providing the highest quality and broadest frequency range. When low-quality responses are used, they tend to limit the frequency response at the low and high frequencies and introduce unwanted audible artifacts. To avoid this issue, use WAV format to ensure that your tones and reverbs are accurately replicated with minimal deviation from the original.
Contributors:
- Jerry Borillo - Illustrator
- Alexander Briones - Editing


