Soundproof Studio Basics: How to Set Up the Right Way
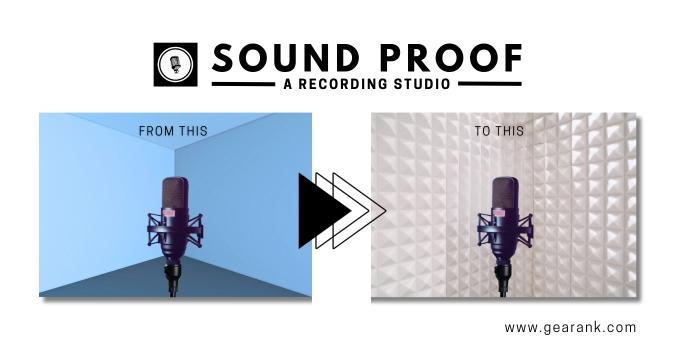
Having a soundproof studio is essential to improve the quality of your recordings and mixdowns. The walls of professional recording studios are covered with unique materials for a reason, and your home recording studio should follow suit.
Soundproofing helps reduce the number of takes you need to do when recording, improving your critical listening experience when mixing and mastering.
Learning how to soundproof a room will pay off in the long run.
This guide will explain everything you need to know about soundproofing, including what it is, how it works, and the best tips for soundproofing your studio.
With this information, you can start recording and mixing like a pro.
What Is Soundproofing?
Do you remember when you first moved into your new place, and your voice echoed in every unfurnished room? It might have made your singing sound better than usual, but that echo differs from what you want when recording.
Soundproofing is the solution to this problem. It stops sound waves from reflecting when sound frequencies bounce off hard, flat surfaces like bare walls and glass windows, causing an echo or reverb-like effect. This effect is even worse in large rooms.
But soundproofing does more than prevent echoes. It also helps to prevent sound from getting in and escaping your recording studio. In other words, it helps to prevent sound transmission. This includes blocking sound from outside, like noisy neighbors and passing vehicles, and preventing what you're listening to from being heard outside.
Soundproofing is also beneficial if you like to play loud music or watch action movies with your sound system cranked up.
Why Soundproof Studio Setup Matters
In professional recording studios, two main processes occur: recording and mixing. Both processes aim to achieve the best sound quality, where studio soundproofing comes into play.
During recording, it is essential to eliminate echoes and outside noises, such as car horns or the band's drummer fiddling with his drumsticks in the mixing room. These sounds can distract the person inside the recording studio and lead to endless takes or unwanted sounds on the recording that cannot be fixed in the mixing stage.
Soundproofing also plays a vital role during mixing, helping producers and sound engineers to hear audio accurately. This includes live audio recordings and the recorded tracks when it's time to mix the song. Reflections off hard surfaces can distort specific sound frequencies and cause a misinterpretation of volume, which can be detrimental during the mixing stage.
Soundproofing for Home Recording Studios
A professional recording studio is not required to produce high-quality audio tracks. However, it is essential to soundproof your home studio to minimize noise and ensure the best possible recording and mixdown quality. Soundproofing is crucial for achieving optimal results, whether recording musical instruments or creating EDM tracks.
What Is Acoustic Treatment?
Acoustics is the science that explains how sound moves in a room. Acoustic treatment is the process that helps you achieve the desired sound in a room.
The challenge with sound waves is that they tend to travel, especially the bass frequencies. Have you ever noticed that you hear more bass than anything else when you stand outside a nightclub? This is because low-frequency sounds have longer wavelengths than high frequencies.
In recording studios, acoustic treatment is vital to stop sound vibrations from traveling and reflecting off walls and other hard surfaces. This also includes preventing unwanted noise from your recording equipment.
This is particularly true for high frequencies because small sound waves bounce off walls endlessly. To prevent this from happening, acoustic treatment aims to absorb these sound waves using soundproofing materials that will be covering your existing wall.
There are various ways to acoustically treat a room, whether you are a professional or you go the DIY acoustic panels route. You can choose the best method that suits your design requirements.
How to Setup a Soundproof Room
To soundproof a room effectively, you need to prevent the sound from escaping and stop exterior noise from coming in by reducing air gaps. Even a small air gap can be problematic, especially in a busy neighborhood.
The science behind it is relatively simple - sound waves travel through walls and gaps and reflect off hard surfaces.
To stop this from happening in your home or professional recording studio, you must absorb the sound before it escapes using dense materials.
These materials prevent sound from reflecting and escaping by naturally absorbing it. The more dense materials you use to cover the walls and floors and seal off gaps, the better your soundproofing project will be. This means cleaner acoustics for your recording, editing, and post production work.
Best Soundproofing Methods
If you're looking to build a soundproof studio, you'll be pleased to know that it doesn't have to be complicated or expensive.
There are many ways to soundproof a home recording studio and improve the acoustics of a room, some of which use items that you may already have in your home.
From DIY acoustic treatment to installing steel doors (for acoustics, of course, not home security), there are several cheap and effective soundproofing methods that you can start implementing in your home recording studio right away.
Sofa
If you have a spare sofa that is big and made of dense materials, it can be an excellent tool for soundproofing a recording studio. The sofa can be an excellent sound absorber regardless of design or age if placed in the recording booth or opposite the speakers.
Additionally, sofas can also function as effective bass traps for low-frequency sounds. If you have a suitable space, don't hesitate to use your sofa to improve the sound quality of your recordings.
Carpets and Rugs
Recording studios can face acoustic problems due to hard bare floors. Like bare walls, your existing floor can reflect sound in different directions, making it an important area to address.
Installing carpeting in the studio or laying down thick rugs to reduce acoustic issues is highly recommended. It's an affordable solution that can make a significant difference in the quality of sound recording.
If you have the budget, you can go for floating floors, which does an even better job at preventing bounces and sound leakage. A floating floor setup is especially useful when your soundproof space is in an apartment, and if you have a drum setup in your studio. You can use acoustical sealant if there are small holes or gaps.
Curtains
Sound travels more easily through windows than walls, making it essential to cover up recording studio windows or sliding glass doors with thick curtains. This will help to reduce external noise and prevent inside noises from escaping.
So, while it may seem like music producers and musicians prefer a dark environment, the heavy curtains serve a practical purpose.
Additionally, it's not uncommon to see recording studio walls covered with curtains, two layers even, providing further noise reduction.
Blankets
Thick blankets can be a great alternative to curtains for improving the acoustics and soundproofing in home recording studios. They are also more affordable, making them a budget-friendly option for covering recording studio windows.
Additionally, placing blankets in your recording studio or home recording space can create a sound isolation barrier that prevents reflections. This is particularly useful when recording vocalists, as the blankets can easily hang from the ceiling.
Egg Cartons
Egg cartons are often considered a good soundproofing material, but they are not very absorbent. They have little effect on mid and low frequencies.
Moreover, there may be better solutions than sticking egg cartons to the walls of your soundproof studio, as it does not help with other critical aspects of your room, such as bass buildup from standing waves and isolation. It may look odd and not serve the purpose you intended.
Foam Panels
If you have a slightly larger budget, foam panels, also known as foam tiles, are an affordable method to soundproof your recording studio. Installing them on one or two walls will improve the acoustics and give your studio a more professional look.
Acoustic foam tiles are made of sound-absorbing material and usually have a pointed or jagged surface. They absorb sound waves and refract sound, making them ideal for home and professional recording studios. They come in standard and custom sizes and are easy to install.
Acoustic Panels
Recording studios often have acoustic panels on their walls for a good reason - they provide excellent soundproofing. These panels are typically made of fiberglass with a standard thickness, making them very dense and capable of absorbing most sound waves in direct contact.
The best part is that acoustic panels can be made in standard and custom sizes. If you need custom sizes, the DIY route is the best option and can be relatively inexpensive. You can create panels that meet specific design requirements, such as color preference, by making them yourself.
Acoustic Steel Doors
If you want to ensure your recording studio is soundproof, consider installing an acoustic steel soundproof door. This door is designed to prevent unwanted sounds from passing through, making it far superior to regular doors made of wood or glass.
If you currently have studio sliding glass doors, it's worth investing in acoustic steel doors to improve the soundproofing. Studio sliding glass doors perform worse at blocking noise than other doors, as they are mostly glass and may not shut tightly.
However, it is possible to soundproof any door. You can cover the door with soundproofing materials and install a door sweep to block gaps. This will help to improve the soundproofing of the door and reduce the amount of noise that passes through. You also use acoustic caulk (acoustic sealant) to seal small gaps around the door and frame.
Conclusion
To sum up, setting up a soundproof studio is a fantastic investment. Recording and mixing will save you time, effort, and money. Don't hesitate! Start by covering your walls, floors, windows, and doors to create a peaceful and productive space.
Contributors:
- Jerry Borillo - Illustrator