Miking drums is almost a "lost art" in the time of 40GB drum sample libraries, electronic music and home music production. Today, starting out making music with drum samples doesn't require knowing how to mic drums. But those of you who want to take it up a notch are getting drum kits and drums mic kits for their home or project studio. Although drum samples make everything easier and more consistent, they also tend to take away from the personalization of both the band and the people behind the production.
Without getting too much into the "back in my day" spiels, knowing how to mic a drum set is an important topic and this guide brings together research and experience to give you more ideas to work off of in your exploration of audio engineering.
Whether you only have one mic or have an entire locker full of vintage mics, going back to the basics and reinforcing fundamental knowledge will give you a sort of "home point" when exploring techniques or coming up with new ones.
How to Mic Drums Overview: Mic selection, Polar Pattern Based Positioning and Mounting
Understanding the tools at hand will help you make better decisions down the line especially when you know how to compensate for a lack of one thing. Mic selection starts with what you have or what you plan to get. It is important to know every detail of the drum microphones you have or will have.
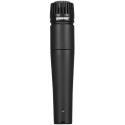
The first is mic type. Although some mics are more obviously labelled for their purposes in their model naming (like a mic specifically labelled "kick"), other more versatile mics go for a certain frequency response. Does a mic favor high or low frequency capturing? Knowing your mics' frequency response will allow you to match mics to the appropriate sound source. Understanding how to mic a kick drum can lend itself to other applications. Sometimes a "kick" mic can work for floor toms for example. Dynamic mics are also usually used in close proximity and with high SPL sources like shells while Condenser mics are usually used further away from drums like overheads, although some condenser designs are meant to be used up close as well. Again, check the specifications before attempting to use a condenser mic for high SPL sources as the shock may destroy more sensitive diaphragms.
The next important detail is becoming familiar with your mics' polar patterns. This will influence how you position them around your drum kit. Cardioid patterns tend to capture sound in front of them so placing an SM57 for direct micing a snare drum for example, requires you to point the capsule towards where you want the sound to be picked up: For more attack, point at the center. For more resonance and ring, a little bit off center. Same goes for toms.
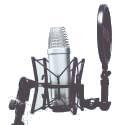
Lastly (for now at least), is how the mics are mounted. Some mics can be mounted via a clip on the drumkit. These clips are usually included with a set. The advantage is that drum mic setup time is easier while the disadvantage is that you will experience more mic bleed and crosstalk (capturing the vibration of the shells not directly miked). These are usually undesirable although some engineers tend to use the bleed to glue the sound of the entire kit together. Clips also limit your placement options especially with toms. Sometimes it is more desirable to use Mic Stands to mic certain parts of the kit to prevent cymbal bleed.
Now, if you want to know the answer to how many mics to record drums, read on.
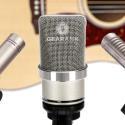
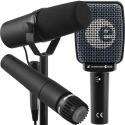
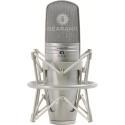
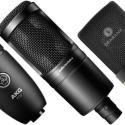
How to Record Drums With One Mic - Large Diaphragm Condensers
Just because you just have one mic doesn't mean you have to compromise your recording quality. While not the best for modern rock and metal, for indie, classic rock, jazz and blues, 1 mic for drums is adequate so long as you use a great Large Diaphragm Condenser Microphone. The most optimal spot for a single mic is directly in front of the kit, elevated at least 1 foot higher than the tallest cymbal and pointing towards the snare. This ensures that the entire kit is captured. To understand how to mic a kick drum and how to get more kick drum, just move the mic down and slightly closer.

We Recommend These Large Diaphragm Condenser Mics:
In this recording entitled "Feliz", I miked up the drums using this technique and recorded the other instruments later. This track is a garage/indie track with a late 60's vibe. To give the mono guitar track more dimension, I added a room reverb. I also employed using an 1176 style compressor to give it a bit of grit appropriate to the vibe of the track. Overall, this track was a challenge I undertook to see how fast we could write and record a song and have it played on the radio. From writing to radio took us 6 hours. Don't underestimate the power of simplicity!
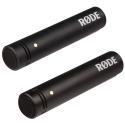
How to Record Drums With Two Mics - Large and/or Small Diaphragm Condensers (Matched Pairs)
Two mics enable you to do either a stereo drum mic setup version of the technique described above if you have a matched pair or a Kick drum/Front mic + Over Shoulder/Overhead mic if you have mismatched mics. Mismatched mics are not optimal for stereo recordings because the stereo field will be compromised with the difference between frequency and transient response.
How to Record Drums with Three and Four Drum Mic Techniques - Glyn Johns Method for Vintage Sounding Drums
Glyn Johns has produced and/or engineered with such artists as Led Zeppelin, The Rolling Stones, the Beatles (during the Get Back Sessions), The Who, Eagles, Bob Dylan. Eric Clapton and more. This is a man who knows how to mic drums. His signature drum miking technique which results in a natural sounding drum kit that can be tweaked to take in more or less of the room the drums are in. While he usually uses three mics, this technique can be used with four.
The method revolves around a mono overhead mic placed above the drummer with another mic beside the floor tom with the same distance to the drummer as the overhead mic. The height of the overhead mic determines how much of the room sound gets captured.
The placement of the next mics is where variations can start to be used. For a three drum mic setup for drums, Johns uses a large diaphragm condenser mic placed in front of the kit much like the mono miking drum technique but placed closer to the kick drum since most of the tone will come from the overhead and side mics. If more kick drum is desired, you can place the front mic lower and closer to the kick drum.
The four mic variant involves a close miked snare and close miked kick. This is the method more commonly used today since it gives more impact from the kick and snare.
Here is an example of the method:
How to Record Drums with Five Drum Mic Techniques - Using Duplicate Tom Mic Tracks for Cymbals for Small Venue Recordings
Five mic kits usually come with mics for the shells only. Companies forgo the need for overheads for small venues since cymbals are already loud on their own. However if you chance upon a live recording with just the shell mics, you can still come up with an overhead mic track for your mix.
What you can do is to duplicate the rack and floor tom mics and apply a high pass filter (low cut) up to 2khz, removing all the low frequencies from the duplicates. the important part here is to hard pan them left and right and not to apply any compression to preserve the bleed of the cymbals to the tom mics. To process the tom mics then, you need to apply a high cut on the original tom tracks (so as not to conflict with our "cymbal" tracks). Put the high cut LAST in the chain after all your processing. This results in a faux-overhead (or what I like to call Faux-verheads) from 5 drum mic setups as can be heard on this recording I did a few years ago of a live band. While there is an overhead mic on the stage, due to a faulty cable or if it got damaged during the band's performance, no signal went through to the recorder I was using so I came to mixing, I had to get creative. It doesn't sound as brilliant as dedicated cymbal mics but they do an adequate job. Just be sure to check your phase.
How to Record Drums with Six and Seven Drum Mic Techniques - Miking Drums with Two and Three Toms
This is what most people would recognize as "standard" with a Kick, Snare, Rack 1, Rack 2 (optional), Floor Tom, and two Overhead Mics. Most recording studios have this set up as a basic starting point.
The only thing that varies here is the placement of the overheads. You now have several options but the most common 3 are X-Y, Near Coincident/ORTF and Spaced Pair
X-Y Miking or Blumlein Miking (after Alan Blumlein, an engineer for EMI who invented the technique in 1931) has both capsules of the overhead mics stack directly on top of each other at a 90 degree angle and is placed in the center of the kit.
Near Coincident/NOS and ORTF miking have both mics facing away from each other at either a 90 degree angle, 12" apart (Near Coincident/NOS), 110 degree angle and 7" apart (ORTF). NOS stands for Nederlandse Omroep Stichting (Dutch Broadcast Foundation) while ORTF stands for Office de Radiodiffusion Télévision Française at Radio France.
To choose between NOS and ORTF miking techniques depend on how large or wide your drum kit setup is. NOS tends to sound better with smaller kits because of the tighter angle while ORTF favors larger kits or capturing better room ambience
Lastly, Spaced Pair drum miking is probably the most common but often misplaced miking technique for drums. I say misplaced because haphazardly putting overheads without taking into consideration their distance from each other and the floor introduces phase issues. There are several schools of thought with regards to drum miking a spaced pair but I prefer two approaches that I call the Arch and the Floor method.
For the Arch method i get a piece of string and tape it to the right edge of the snare and pull the string to a space above the center of the hat, crash and rack tom. This is where you will place the first mic. For the second mic, I use the same string and place it above the spot between the ride and the floor tom. Both mics point to the snare drum. This results in a tight overhead sound with lots of snare tone coming through.
If i need more cymbals, I use the Floor method. I still use string and tape it to the floor in between the hi-hat and left-hand side crash. For the right-hand side mic, I use the same length string and place the mic above the spot between the outer rim of the tom and the ride. Mic height here is dependent on how much of the room you want to capture. The higher the mics, the more room gets captured.
There are literally an infinite amount of possibilities you can do with overheads but so far these are the ones that are my go-to's.
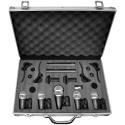
We Recommend These Drum Mic Kits:
How to Record Drums with 8 Mics - Capturing the Kit's Nuances Including a Hi-hat Mic
What to do with an extra mic? You can either establish a mono room mic or use it as a drum hi-hat mic. For tighter sounding drums, use a drum hi-hat mic to capture the nuances of the playing. This is useful for genres like funk where hi-hat play is common. For bigger overall sound, a mono room mic captured at the end of the room then processed with a little reverb during mixing glues the sound of the entire kit and gives life to recordings that will eventually be layered with samples. It also keeps the drums from sounding too "dry" after gating the shells to minimize bleed.
Beyond Eight Mics: Room Mics and Experimental Approaches
So you have a ton of mics. What to do then?
Other things you can do beyond this are utilizing a stereo room mic or more. I've mixed projects with as much as 5 room mics with close and far placements including a mono room. These are just for options or you can get creative with how to mic drums and use room mics during intros to make the drums sound distant.
One trick I learned from Audio Engineer Kurt Ballou is to leave the room mics on after recording drums and place guitar amps and bass amps as though it were a live performance in the room and recording the rest of the instruments close miked with room mics. Then you can mix in the room mic sounds for all instruments to glue the entire track together subtly. It's a bit more complicated and experimental but I do encourage you to try it when you have the resources (and time!). Doing this method requires an acoustic treated room complete with acoustic panels and bass traps, and DIY acoustic panels. Similar principles are used in Guitar Micing.
Another alternative approach is to use electronic drum kits, which can now be had for cheap. With these you won't even have to worry about mics.
Conclusion
So much can be done with drum microphones whether you have just 1 or 20. In the end there are no rules when it comes to knowing how to mic drums (after I said all that!) but you have to learn the rules in order to understand what breaking them does to your sound. Sometimes it works, sometimes it doesn't but knowing guidelines and standards lets you know how much they deviate from the norm and helps you understand things better when you experiment.
If you have any questions about miking drums for recording, just ask below and I'll try to help.
Happy Miking!
About the Author and Contributors
Raphael Pulgar
I've been an audio engineer for 20 years specializing in rock and metal recordings. I also play guitar and produce original music for my band and other content creators.
Contributors
Jason Horton: Editing and Illustrating.
Images/Media
Main/Top Image, Recording Drums With One Mic and Glyn Johns Method: Copyright © 2023 Gearank.com.
Overhead Mic Positioning: XY, NOS, ORTF and Spaced all based on images by Iainf, modified by Gearank.com and published under Creative Commons CC BY-SA 3.0 license.
The videos have been embedded in accordance with YouTube's Terms of Service.


 The Best Condenser Microphones Under $100 - XLR & USB