

Home Recording Studio Equipment List for Professional Sound
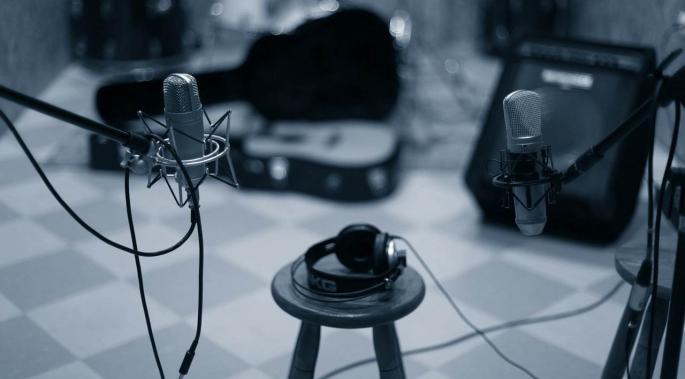
Home recording studio setup always seems to be a daunting task for many who are starting out. With the sheer number of recording studio equipment required, setting up a home studio can be intimidating.
Here you'll find useful information that can help you plan for your first project studio at home. You can also use it to brush up on studio know-how. This long list of home recording studio equipment covers just about every type of gear you'll need to consider.
You can skip the long list of studio recording equipment, and go straight ahead to the list of basic gear used in beginner studio setups..
We also recommend you read How To Set Up A Home Recording Studio.
Recording Studio Equipment List:
Microphones
Below is an overview of this topic. For a more in-depth look, which covers additional microphone characteristics including polar patterns and diaphragm sizes, see: The Different Types Of Microphones and Their Uses.
-
USB Mics
If you're going for a simple recording studio equipment set-up then the first thing to consider getting are USB mics. They connect directly to your computer and won't need a USB audio interface.
Another good thing about them is that you don't have to worry about phantom power because they take their power directly from the USB connection. If you're using a tablet like the iPad which can't provide enough power for multiple mics then you'll also need to use a self-powered USB hub.
USB Mics today are decent vocal recording mics. You will also have no problem Recording Acoustic Guitars as long as you use proper mic positioning. One you have the basics of how to record music down, and you have a good USB mic, then you're set to start recording.
-
Condenser Mics
 No home recording studio setup is complete without at least one condenser microphone. These are the mics most often used for recording vocals. Condenser mics have wider frequency range and are much more sensitive than Dynamic Microphones. They respond to higher frequencies better, which allows them to pick up more subtleties in dynamic range. Note that condenser microphones need Phantom Power to operate.
Some condenser mics come in a home recording studio package. They are a great way to get started on setting up a home studio.
Condenser mics are also used to capture acoustic instruments such as acoustic guitars.
One of the best-known examples is the Neumann U87. Modern variants of it cost over $3,000 so you are much more likely to find an MXL 990 or Rode NT1A in a home studio. For more information see our guide to the best condenser mics under $100.
-
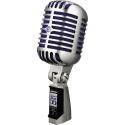
Dynamic Mics
These are the work-horse mics of rock and they can take nearly any kind of punishment you can dish out. They're not as sensitive as most other mics in frequency response and dynamic range (volume differences). But, their ability to withstand very high SPLs (Sound Pressure Levels) means you can use them on anything from a kick drum through to vocals. The most famous examples in this category are the Shure SM58, it is used on everything from vocals to instruments. Another great example is the Shure SM57, popularly used on instruments and their amplifiers. Many of these types of mics can be bought in versions that use cables and as part of a wireless mic system. Since they also pick up sound closer to the mic, they're a great choice if your studio doesn't have acoustic treatment yet.
-
Ribbon Mics
These were invented in the 1920s. They produce a signal based on the velocity of the air that hits the ribbon. This leads to interesting characteristics such as taming harsh sounds. They usually have a 'vintage tone' heard on many recordings from the 1950s and 1960s. Ribbon Mics typically don't use phantom power. Modern active ribbon mics like the Rode NTR do. Always check before using phantom power. It can burn out the ribbon if it's not supposed to be used on a particular mic. Ribbon mics tend to have a greater degree of roll-off on higher frequencies than condenser mics. If you already have dynamic and condenser mics then you might like to consider getting a Ribbon Mic to add to your tonal palette when recording.
-
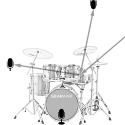
Drum Mics
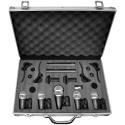
It's not often you see a full drum kit in a home recording studio. Unlike vocal or general instrument mics, drum mics usually come in a set. Although you can use standard condenser mics on drums, you'll find you get better results with specialty drum mics. They're designed to handle very high SPLs and specific frequencies of different types of drums. There are different types of drum mics designed for each piece of percussion in a drum kit. This includes different types of cymbals, and you can buy a drum mic kit that will give you everything you need to record acoustic drums.
-
Mic Accessories
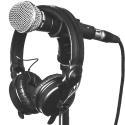
Mic Stands
In the studio, it's best to go for boom stands because they're the most versatile. These microphone stands let you position your mics accurately to record all kinds of instruments and vocals. Here's our guide to Mic Stands for Stage and Studio. Also consider creating your own DIY vocal booth if your recording in a non-treated room.Pop Filters
These are a necessity for recording vocals because they can save you from having to do unnecessary retakes just because the singer popped or breathed directly on the mic causing the input signal to be clipped or distorted. Place a pop filter between the singer and the microphone, just like the picture on the left, and the problem is largely avoided. Check out our Pop Filter Guide.
 No home recording studio setup is complete without at least one condenser microphone. These are the mics most often used for recording vocals. Condenser mics have wider frequency range and are much more sensitive than Dynamic Microphones. They respond to higher frequencies better, which allows them to pick up more subtleties in dynamic range. Note that condenser microphones need Phantom Power to operate.
 These are the work-horse mics of rock and they can take nearly any kind of punishment you can dish out. They're not as sensitive as most other mics in frequency response and dynamic range (volume differences). But, their ability to withstand very high SPLs (Sound Pressure Levels) means you can use them on anything from a kick drum through to vocals.
  These were invented in the 1920s. They produce a signal based on the velocity of the air that hits the ribbon. This leads to interesting characteristics such as taming harsh sounds. They usually have a 'vintage tone' heard on many recordings from the 1950s and 1960s. Ribbon Mics typically don't use phantom power. Modern active ribbon mics like the Rode NTR do. Always check before using phantom power. It can burn out the ribbon if it's not supposed to be used on a particular mic. Ribbon mics tend to have a greater degree of roll-off on higher frequencies than condenser mics. If you already have dynamic and condenser mics then you might like to consider getting a
  It's not often you see a full drum kit in a home recording studio. Unlike vocal or general instrument mics, drum mics usually come in a set. Although you can use standard condenser mics on drums, you'll find you get better results with specialty drum mics. They're designed to handle very high SPLs and specific frequencies of different types of drums. There are different types of drum mics designed for each piece of percussion in a drum kit. This includes different types of cymbals, and you can buy a
  These are a necessity for recording vocals because they can save you from having to do unnecessary retakes just because the singer popped or breathed directly on the mic causing the input signal to be clipped or distorted. Place a pop filter between the singer and the microphone, just like the picture on the left, and the problem is largely avoided. Check out our
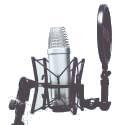

Headphones
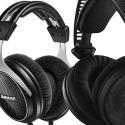
A pair of headphones would be one of your first pieces of home recording studio equipment. There are four basic types of headphones:
- Open Back - the best frequency response, but spills noise out the sides.
- Closed Back - the best isolation but some cheaper models overemphasize the low-end frequencies.
- Semi Open Back - Semi Open Back - high-end versions provide as good a frequency response as open back but with limited spill over.
- Ear Buds - not optimal for critical mixing but they are a good reference for listening to what the end listener would likely hear.

-
Mixing / Monitoring
Although you generally want to mix music using studio monitors, you can get away with using high-end open back headphones if you don't have monitors. Even with monitors, you may still want to check the mix with studio headphones. This is to see what it sounds like without the acoustic effects of your mixing room coming into play.
Finally, you'll benefit from having a set of Ear Buds. Many people listen to music using earbuds with their personal music players and smartphones, so it's worth checking using them.
-
Recording
If you're working on a limited budget, then the best bet is simply to go with closed back headphones. They are the most versatile with the least amount of spill. In fact, drummers benefit from the additional low end making it easier for them to hear the bass frequencies in their mix.
If you have extra money to spend then consider getting a set of semi open back headphones for recording vocals. Their improved frequency response can help to get better a performance from the vocalist while not letting too much of the mix spill into the mic. Many home recording studio setups start with closed back headphones as a do-all piece of gear. Better yet get one of each, as Open Back and Closed Back Headphones have their own distinct uses in studio settings.
-
Headphone Amps
If you're going for a simple recording home studio setup then you won't need a headphone amp. The headphone output from your mixing desk or audio interface will be enough. this is true for most standard consumer headphones.
Recording multiple performers? Monitoring with multiple people in a quiet environment? Then you will benefit from studio recording equipment like headphone amps. It outputs different mixes in some of the headphones, or you're monitoring with multiple people in a quiet environment,
If you're using high-end, high impedance open back headphones for mixing, then you'll also want to get a headphone amp. This helps avoid clipping if you're running the headphone output of your audio interface or mixer too loud to get the volume you want.

Mixers
At its simplest a mixer allows you to take multiple incoming signals and mix them together. More complex Mixing Consoles may have a range of signal processing tools like EQ built into every channel. They can have multiple signal routing options such as multiple busses, groups, inserts, and direct outputs.

Home recording studio setups today seldom start with a mixer. Because your DAW can provide all the functions of a mixer for sounds that you've already recorded. Still there are instances where you might need one. You will still need one if you want to record from more sources than you have channels on your audio interface. For example, you might want to record a drum kit with 8 microphones. If you only have 2 channels on your audio interface, you will need to send all the mics through a mixer. This is to mix them down to only 2 channels before you send the signals into your interface.
-
Analog Mixers
Also known as mixing consoles. These use hard-wired physical circuitry for carrying, processing, and routing all the signals you are mixing. They have built-in mic preamps and are often used in conjunction with audio interfaces that only accept line level inputs. Or in any situation where the number of signals you are recording exceeds the number of inputs on your audio interface. (see the paragraph above for an example).
-
Digital Mixers
Although you use these the same way as their analog counterparts, most of the internal circuitry is 'virtual'. They come with mini computer systems inside the hardware. The exception is that the preamps, which are usually the first step in the signal path, are analog. They then pass the signal directly to the A/D converter.
Once all the processing is done the signal can either be transferred to your computer in a digital format or converted back to analog. (Necessary for monitors and headphones).
Some digital mixers also have ethernet and WiFi networking built in for sending audio data or for remote control by a tablet or laptop. A good feature to look for in mixers is Audio Ducking, which lets you lower the volume as needed to make way for other tracks.
-
Summing Mixers
These are expensive pieces of equipment and are generally not needed for basic home recording setups.
What they do is take multiple line level inputs and mix them into 2 line level outputs. This is the same as sending multiple channels on an analog mixing desk to a stereo bus. There are a range of ways they can be utilized.
One the most common uses is to send channels from a DAW to an analog summing mixer to produce a stereo output which is then sent back to the DAW. Some audio engineers do this because they don't like the sound of doing summing mixing ITB (In The Box) and instead prefer the tone of an analog summed mix.
There are huge debates over whether or not summing is a good thing - if you'd like to know more, see this discussion.
Recording Systems
You have two main options here - whether to use a computer-based system or a digital multitrack system. By far, most home recording studios, and even most professional ones, choose to go with computers. Given that most musicians already have a computer this is the most cost-effective way to go.
-
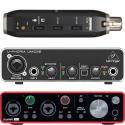
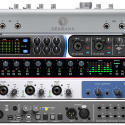
Audio Interfaces
Audio interfaces are the devices that capture audio, convert it into a digital signal, then transfer it to your computer. They also take the digital audio from your computer and turn it back into an analog signal for playback through your monitors.Your main considerations in choosing which one to get will be the number of channels you want to record on simultaneously. As well as whether or not it has built-in mic preamps and phantom power. The latter will be determined by the types of microphones you use and whether or not you use a separate mic preamp.
You will also need to consider how many microphone inputs or instruments inputs are needed, depending on what you intend to record.
Most of the options on the market today (from popular brands like Focusrite, Universal Audio, M Audio and more) support a minimum of 44.1 kHz sampling rate (some go up to 192 kHz) and 16-bit depth. This is sufficient for producing high quality music. There is a lot of debate about sampling rates so if you'd like to know more see: The Science of Sample Rates (When Higher Is Better — And When It Isn’t).
There are a number of factors that influence the sound quality and tone of an audio interface. Particularly the microphone preamps and D/A & A/D converters. Generally speaking, the more you spend the better quality you'll get.
Many interfaces also come with "Direct Monitoring" or "Zero Latency Monitoring". This is to ensure that what you're hearing is exactly synchronized to the recorded tracks. This is vital to ensure the people playing new tracks are in time with the recording.
The problem of latency typically arises when your computer lacks the processing power to send the audio out fast enough. This feature is designed to solve that problem.
For more information see our guide to the best cheap audio interfaces with 2 channels.
-
Computer & Software
Most home recording systems these days have a PC, Mac, or iPad as the primary recording device. It's used with a DAW (Digital Audio Workstation) as the main software for editing, processing, and mixing the audio.
Some of the most commonly used DAWs with laptops and desktops are Cubase, Cakewalk, Pro Tools, and Apple Logic. The most popular DAW app for the iPad is GarageBand. Note that professional DAWs like Pro Tools cost a lot of money and the learning curve is quite long. So if you're just starting out, it would be best to learn the ropes using cheaper DAW or even free music production software like Audacity.
There are also many specialty DAWs suited to specific production styles such as EDM like FL Studio and Ableton Live. They are also used in live performances.
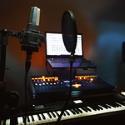
Computer Noise
It's quite common in small home studios to record in the same room as your computer. When they get hot computer fans kick in and can make a lot of noise - this is particularly true with laptops.You can try to keep your computer cool either by using a cool or air-conditioned room or you can try a laptop stand. This is one of the reasons why a bedroom studio makes sense, because it usually is already air-conditioned and have good sound isolation.
If you have the budget and space, you can transform one of your rooms into a Soundproof Studio, then you won't have to worry about noise.
If you can't stop the noise then try some of these tips to reduce the problem:
- Place the computer as far away as possible from your microphones.
- Put a sound barrier between the computer and the mics.
- Put the computer in a separate room and run cables through for the monitor, keyboard, and mouse.
- Copy the big recording studios and use a soundproofed Isobox - this option can be quite expensive.
- If all else fails you'll need separate recording and control rooms.
-
iOS / iPad
The iPad doesn't come with a standard USB port so you will need to get a CCK (Camera Connection Kit) if you want to use it with any USB microphones or audio interfaces.
One important thing to note is that although you can get generic brand CCK devices you should only get the Apple CCK for recording audio. Many people have found that generic ones don't always continue working properly when your version of iOS is upgraded.
Also, the amount of power provided to USB by the iPad is limited, so it's best if your USB devices supply their own power.
-
Android
Android devices are not typically used for recording multitrack music. The Android operating system doesn't meet industry standards. It doesn't provide audio timing guarantees and has latency issues. This may change at some point but there's still no solid indication of when it might happen.
-
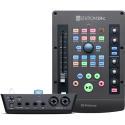
DAW Controllers
These are usually pieces of hardware that you can use to control your DAW. In some cases, they can be DAW Controller or Remote Control apps running on tablets including the iPad.
Although these are not necessary because you can do everything you need to in your DAW with a computer keyboard and mouse. Nonetheless, they help make your workflow more efficient.
Software controllers running on tablets can also be a convenient way to remotely control your DAW. This can be particularly useful if you have a separate sound booth and control room but you need to control the DAW while recording on your own.
-
Digital Multitrack Recorder
These are essentially a computer and a mixing desk with AD/DA converters integrated into a single piece of hardware. Although these aren't as flexible as using a computer because you can't change your main DAW software, they are reliable and convenient.
You don't get the problems you sometimes do with trying to get all your recording software and hardware to work together on a computer-based system.
Although they can be more intuitive to use than many computer based systems, they have become less popular over the last few years. This prompted manufacturers to add features such as making them work as audio interfaces, samplers, and DAW controllers. This has made them much more attractive to budget-conscious musicians and producers. Take a look at our guide to The Best Multitrack Recorders.


Studio Monitors
Your studio monitor speakers are one of the most important pieces of a good home studio. The main thing you want to look for are ones that provide a flat response across the spectrum of frequencies that humans can hear. This is typically from 20 Hz to 20 kHz.
The point is that you don't want your studio monitors to "improve" the sound. Monitors are not like Hi/Fi systems that make music sound better. Instead, you want them to be as accurate as possible. You need to hear it warts and all in order to get the best possible mix. And this is the main difference between Studio Monitors vs Speakers, where consumer speakers focus on sound enhancements.
You can use consumer speakers for final listening of your tracks, but never use them for making mixing and mastering decisions.

-
Passive
They are called passive because they don't have amplifiers built into them. Passive monitors were originally the main type of reference speaker used in professional studios. If you choose to go passive then you need to be very careful that you match them with the right kind of amplifiers and crossovers. This is to get the flat response you're looking for. One of the most famous examples was the Yamaha NS-10.
-
Active
Active studio monitors have amplifiers and crossovers built in and are the most common type found in home studios. They are also found in many professional studios these days. They offer a range of benefits. The most apparent one being that you don't need to have additional amps or the need to worry about pairing them to the speakers. You can take them out of the box and plug them in.
The KRK Rokit series and the Yamaha HS series are two of the best examples of active monitors that you'll find in both home and professional studios. Both brands are featured in our gear guide to the best studio monitors under $1,000.
-
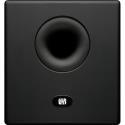
Subwoofers
Subwoofers do the exact opposite of providing a flat response - they magnify the bottom end. If you are making special mixes for dance clubs, or for film and television, then you would likely want to hear how the mix will sound in those settings.
Many people also find them quite useful for taking the bottom-end load off their main monitors. This helps them to produce a clearer and crisper sound. For more information see our Studio Monitor Subwoofer Guide.
-
Surround Sound & Multi-Speaker Systems
These types of multiple-speaker systems are only needed for producing music that will be played in special settings. Examples include commercial and home theaters.
-
Monitor Amplifiers
These are the type of amplifiers you need to get if you're using passive studio monitors. Smaller ones are also used in studios to power headphones as well.
-
Personal Mixers
These allow you to take in multiple audio channels and produce personalized mixes for multiple people. These are particularly useful when recording musicians that need to hear a different mix. Some even come with built-in effects.
-
Monitor Management
Here we are referring to outboard gear, rather than the signal processing you do inside your computer. This studio recording equipment is typically mounted in racks although some items can be designed to sit on a desktop.
-
Headphones
See the Mixing / Monitoring headphone section above.
Signal Processing
Here we are specifically referring to outboard gear, rather than the signal processing you do inside your computer, and this equipment is typically mounted in racks although some items can be designed to sit on a desktop.

-
Preamps
Most home studio equipment setups include preamps. In their simplest form, preamps take a signal and amplify it to line level. They can be used for any incoming signal that needs boosting, but their most common use is with microphones.
Many audio interfaces have preamps built in so they're not completely necessary for home studios from a technical point of view.
There are several different kinds of preamps, many of which are designed to color tone:
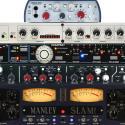
Solid State Preamps
These are typically the most transparent, meaning that they don't color the tone. And they are able to produce a lot of gain with very little distortion.Tube Preamps
Many people just love the sound of vacuum tubes and like to use these to add warmth to the microphone.Hybrid Preamps
These offer some of the sonic features of both solid state and tube preamps by using both types of circuitry to amplify the signal. They use solid state circuits at the input stage and then a tube in the final gain stage.Modeling Preamps
These generally start off with a solid state circuit for the input. Then, the signal is digitized and parsed by software to replicate different kinds of preamps, both classic and modern.You will find the following buying guide on this topic quite useful: The Best Microphone Preamps.
-
Channel Strips
These are essentially preamps with the kind of additional signal processing. Components usually include a compressor, equalizer, exciter, and even a de-esser. Different channel strips come with different combinations of signal processors. To see some examples take a look at our best channel strip guide. This is another important piece of music studio equipment to have.
-
Compressors / Limiters
A compressor reduces the dynamic range of a signal. In other words, it reduces the difference between the loudest and quietest levels. This is very useful for getting consistent levels recorded. Compression rates are measured as a ratio - 4:1 would mean every 4dB increase in input will only lead to a 1dB increase in output.
A limiter places an upper ceiling on the output level to prevent clipping. In the digital world clipping instantly becomes distortion.
You can use hardware compressors and limiters at the input stage before your signal reaches your audio interface. You can also use software plugins in your DAW to process signals that have already been recorded.
-
Expanders / Gates
Noise gates and expanders are used to cut the output signal once the input level drops below the threshold you've set. Gates act more like an on/off switch when the audio reaches the threshold. An expander attenuates the output in relation to the input - a bit like the way compressors work but in reverse.
These are particularly useful for recording loud sound sources like drums and guitar amps. When recording drums this will help to prevent spills between the various drum tracks. With guitar amplifiers, this will cut out the hum of the amp when the guitarist isn't playing.
-
EQ
The equalizer it a critical piece of music recording equipment. It is used to boost or reduce the volume of specific frequencies and they come in two basic types:
Graphic EQ
These take the input signal and break it up into frequency ranges called bands. You control the level of each band typically with a fader-like control. If only 3 bands are used then they might be knobs instead. In a recording setting you will use a large number of bands - 15 or 31 bands on hardware equalizers.Parametric EQ
These give you a more precise level of control over a narrow range. You generally have 3 parameters you can adjust: the center frequency, the bandwidth, and the gain. Select a center frequency, then dial in the bandwidth which determines how wide the center is. Then turn the gain up or down.If you'd like to know more about this topic see How to Use a Parametric Equalizer
-
Effects
Any signal processing device can be considered an "effect". Here we're using the term to describe processing that does more than influence the tone. The primary effects you'll use are reverb and delay. Although all types of effects can be in software/plugins, there are still many who prefer using outboard gear.
Outboard gear does reduce the load on your computer when you don't have to run as many plugins. And they are the preferred professional recording studio equipment, by those who have the extra budget and space.
Lexicon is one of the most famous brands when it comes to reverb.
-
Exciters / Enhancers
These devices brighten up or add sparkle to a track - often vocals. They overcome some of the limitations of EQ which boosts specific frequencies but can boost high-range hiss as well. Exciters work by modifying frequencies dynamically in relation to their input volumes. Sometimes adding in some harmonic synthesis, and even adding some subtle harmonic distortion.
The most famous example is the Aphex Aural Exciter which popularized this effect in the 1970s. This is a complex topic, so if you'd like to know more about exciters see How Enhancers Work.
-
500 Series
These are signal-processing units that do the same things as all the others discussed here, but they come in a smaller format. They drop into a special 500 series rack and can be easily mixed and matched.
A 500 Series processing unit is more compact than a full-sized rack-mounted model. It can save you considerable space and is easier to carry around. around, both of which are important factors for home studios to consider.
One of the factors that have been driving their popularity in home recording studios is that they also tend to be cheaper than full-sized units. The cost savings are partly achieved because the rack in which they sit provides the power and the signal inputs and outputs. If you have the old-style racks you can even get 500 series chassis which are rack mountable.
-
Mastering
Mastering is the process of taking the final mix and producing the Master copy for replication. It is a task that needs a perfect listening environment, excellent equipment, and a lot of experience.
Mastering can be done on computers, but there are still many mastering engineers who prefer to use high-end hardware. Mastering hardware involves similar gear to other parts of the music production process. Only the goal is different.
Most home recording studios don't use high-end gear for this. They either do it on their computer or send their digital audio files to one of many online mastering services and get them to do the work.
If you'd like to learn the mastering process yourself, take a look at this excellent resource for beginners: How to master your own music – the basics.
MIDI Gear
MIDI stands for Musical Instrument Digital Interface. It's the main protocol between electronic instruments, controllers, and computers. It allows sending information about musical notes and control data such as changing patches.

-
MIDI Interfaces
These are simply used to let you plug MIDI cables into your computer. Most audio interfaces also have a MIDI interface built in so you generally don't need to get a stand-alone MIDI interface.
-
MIDI Controllers
You can gain a lot more expression by playing tracks with a MIDI controller rather than programming them. MIDI controllers come in many forms - here are some of them:
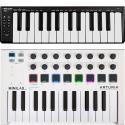
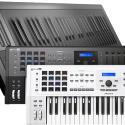
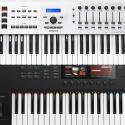
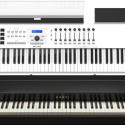
MIDI Controller Keyboards
MIDI Keyboards come in a variety of sizes from 25 to 88 keys. They can have a range of features including velocity sensitivity and aftertouch to additional Pads for input. Other options include modulation wheels for additional expressiveness such as note bending.Here are the best 25 key controllers sorted by Gearank, and here are the best 49 key controllers sorted by price bracket. The same presentation has been done on our guide to The Best 61 Key MIDI Controller Keyboards.
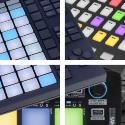
MIDI Pads
This method of control was first popularized by the Akai MPC60 which was a polyphonic digital sampler released in 1988. Pads have become a very popular method for inputting MIDI data. DJs and EDM producers use them for both live and recorded music production.They range in complexity from simple input devices to ones that include built-in sequencers. Some are even designed for specific DAWs - a good example of this is the Novation LaunchPad for Ableton Live. Akai are still a leader in this space. They make many modern MPC systems in both hardware and app forms.
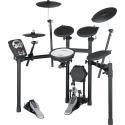
Electronic Drum Sets
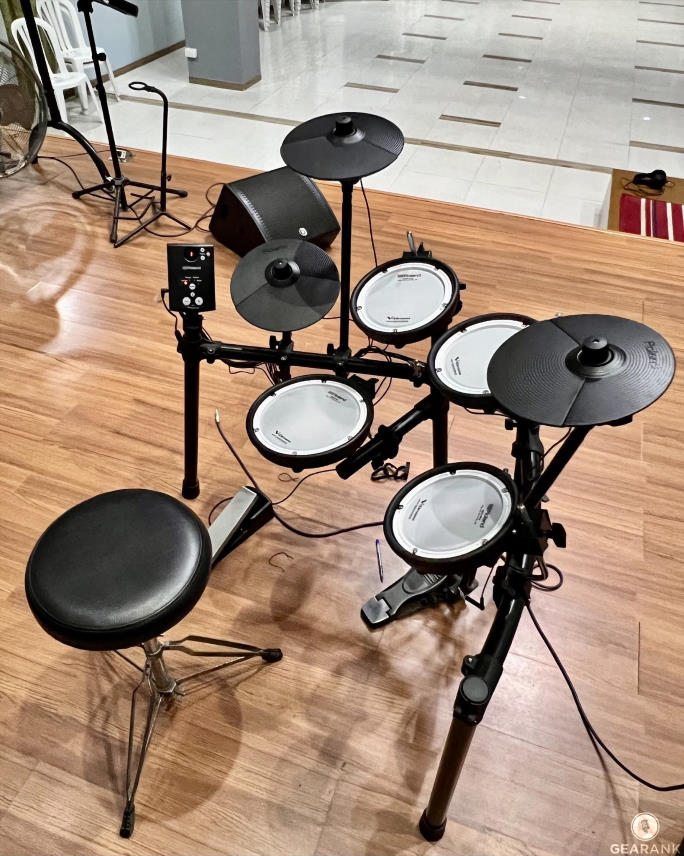
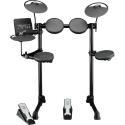
Because of how quiet electronic drum sets are, they are the perfect music recording equipment for home studios. Their ability to trigger different sound samples make them a versatile piece of recording equipment for music. Jon Farriss, the drummer for INXS, was one of the first to popularize this technology back in the 1980s. He began using a hybrid combination of electronic and acoustic percussion live and in the studio.
Roland TD-1DMK set up on stageIt is possible to record with acoustic Drum Setups and later convert the tracks into MIDI in your DAW. But, you will get the most reliable results by using an electronic drum kit.
Today, about every piece of conceivable percussion has an electronic equivalent. Once you have your tracks laid down in MIDI you can use samples and synths to make your drums sound any way you want them to in the final mix.
One of the most famous brands is the Alesis DM Series which come complete with their own sound engines and libraries of preset kits. See our guide to cheap electronic drum kits for beginners.
Specialized Instrument Controllers
Many kinds of physical instruments have MIDI versions such as:- MIDI Guitars & MIDI Pickups
- Keytars
- MIDI Woodwind
-
MIDI Sound Units
In a basic home recording setup, you'll use virtual instruments as plugins in your DAW. There are still many people who like to use hardware synths and samplers. One benefit of doing so is to reduce the load on your computer's CPU and RAM. Some virtual instruments can be very resource hungry. Some people also use them because they prefer the sounds they're able to produce with analog synthesis.


Additional Gear
Here's a range of music production equipment that can come in handy in a project studio.
-
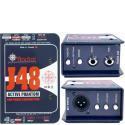
DI Boxes
What is a DI Box? These act as specialized preamps for Electric Guitar, Bass, and Acoustic-Electric Guitars. They also convert the unbalanced instrument signal into a balanced one. This is useful if you have to run cables more than a few yards. They reduce the amount of noise caused by electrical interference acting on the cables.
Most Most of the kinds of audio interfaces used in home studios have special instrument inputs so DI boxes aren't always necessary. But using DI boxes can still be beneficial, as they can give you a more constant signal coming into your interface. Some DI boxes also come with added signal processing features. These are like channel strips designed for guitars.
For more information see our Best DI Box guide.
-
Patchbays
Patchbays route signals from one device to another device. For example, you might be sending the vocal tracks from your mixer to a reverb unit and back again. But, you decide you want to use a different reverb unit sitting in your rack. You could unplug one and plug the other in, but that becomes tiresome and messy once you have a lot of outboard gear.
Instead, you can have a patchbay which is already plugged into both reverb units. You can take a plug out of one socket on the patchbay and plug it into another one to reroute the signal to your preferred device.
If you only have a small amount of outboard gear then you won't need one. but as your equipment starts to build up you'll find you save a lot of time and hassle by using a patchbay.
-
Phantom Power
Some microphones need their own power supply - particularly condenser mics. Mic preamps supply phantom power, as do many audio interfaces and mixing consoles. You generally don't need to buy a separate phantom power supply unit, but they are available if needed.
-
Power Conditioners
Sometimes you'll find you're getting noise coming into your recording system through the power supply. This is usually caused by appliances in your home. Most homes have multiple power circuits. The simplest solution is usually to figure out which circuit the offending appliance is on. and take your power from a different circuit.
Unfortunately, this isn't always possible. Home wiring or drawing more power than the "clean" circuit will allow before flipping the circuit breaker or fuse. If this happens then you'll need to get a power conditioner.
-
Cable Testers
Although not usually necessary in a home studio they can come in handy when you have a lot of equipment. A cable tester will allow you to find problematic cables.
-
SPL Meters
Sound Pressure Level Meters are high-end decibel meters - they let you test how loud a sound source is. A free alternative for approximate readings can be a dB meter app for your smartphone.

Acoustic Treatment
Acoustic treatment is an often overlooked part of home recording studio design. You want the room you mix in to be acoustically neutral. It shouldn't have any reverb and it shouldn't shape the high and low frequencies. Bad reverb and ambient noise can mess up recordings even when using expensive home studio equipment.
You may also want the same thing in your recording room. Acoustic treatments solve background noise and similar problems. SOS has a very useful resource: A Beginners’ Guide To Acoustic Treatment.

Pictured above: a room treatment kit from Primacoustic
-
Absorption
Absorption products solve one of the most common problems. This includes sounds bouncing and reflecting off hard surfaces. This problem is particularly bad when you have parallel walls.
For a dramatic demonstration of this effect go into your bathroom and clap and you'll hear it. Acoustic foam and acoustic panels are often used to help reduce this problem. Acoustic treatment designed for absorption comes in materials like foam or rock wool.
-
Diffusion
Diffusion products scatter audio waves so they don't build up in a particular spot. They are also good at preventing standing waves. An additional effect of diffusing the sound is that it can make your room sound bigger than it actually is. Diffusers are acoustic treatment fixtures that use harder materials with an irregular pattern.
-
Bass Traps
These are acoustic treatment fixtures that use dense material to mitigate low-frequency build-up. Low frequencies have long wavelengths that tend to travel along surfaces like walls and build up in corners. This problem is reduced by putting bass traps in the corners.
-
Drum Shields / Isolation Booths
These are pieces of acoustic treatment that mitigate or prevent sound leakage. Although they're usually used for drums they can be used whenever you're recording any loud sound source.
They reduce the spill between tracks and many modern ones use transparent materials. This is so your drummer can take visual cues from the rest of the musicians.
Studio Furniture

-
Desks / Workstations
You can get specialized desks designed for desktop computer based recording process. They have places for your computer, computer monitors & keyboard, interfaces, and studio monitors. They often include cable management systems. You also have to consider Lighting, good ambience makes for more enjoyable music production.
Larger ones can also accommodate mixing consoles and even outboard gear. They come in all kinds of shapes and sizes so you shouldn't have too much trouble finding one that suits your needs.
-
Equipment Racks
At first, you'll sit your outboard gear on a desk or makeshift stand, but as the amount of gear you have goes up you'll need to get proper studio equipment racks.
-
Studio Monitor Stands
You generally want to place your studio monitors so that your head forms an equilateral triangle with the two monitors. The best way to achieve this is usually to use stands designed for this purpose. They usually come with the added bonus of having dampening pads to prevent transferring vibrations to your speakers. This can happen if you sit them on your main work desk. Here's our list of the best monitor stands.
-
Monitor Isolation Pads
If you're sitting your studio monitors on your desk or workstation then you need to get a set of isolation pads. Spending thousands of dollars on your monitors would be a waste if you let vibrations interfere with the sound. A good example is the Auralex MoPADs.
-
Music Stands
It helps to have one or two of these sitting around. No more sticking lyric or tab sheets to the mic stand. Simple.
Some Typical Home Recording Setups For Beginners
When you're starting out, it helps to keep things simple. Let your range of recording equipment grow as your experience and skill grow.
The Simplest Possible Setup
-
Computer or Tablet
Any desktop or laptop computer you've bought in the last few years will be good enough to start with. If you're going to use a tablet, then go with the iPad.The Android operating system may have problems guaranteeing precise audio timing.
-
DAW
Your Digital Audio Workstation is the software you'll use for all your recording, effects, mixing, etc.
-
USB Microphone
You can plug these directly into your computer without the need for an audio interface.
-
Headphones
You'll want closed back or semi-open back so you can use them for both recording and mixing.
A Typical Beginning Setup
Although you can start with the list above, you'll find it a bit limiting after a short while. This list comprises the core set of audio equipment found in most computer-based recording setups.
-
Computer
It can be either Mac or PC. Macs tend to be a little more stable because the hardware is thoughtfully specified. PCs allow for an almost infinite set of hardware configurations. Compatibility might be an issue for either one. Exercise caution when doing deep updates.
-
Audio Interface
Get one with at least 2 channels that can both accept a microphone input and 1 channel as an instrument input. You'll have the option to Record in Stereo. Sometimes you might want to record vocals and an instrument at the same time. Get an interface with more channels than you think you need.
-
DAW
It's a good idea to choose a DAW that works with one of the major plugin formats such as VSTi or AU. This way you'll find it easier to get cheap and free plugins you can use for effects and virtual instruments. Another thing to consider is that many audio interfaces come bundled with an entry-level DAW. This is a good option because you'll save a few dollars. It also guarantees the DAW and interface will be compatible.
-
Microphone
If you only have enough room in your budget for 1 mic, then make it a Shure SM57. You'll be able to record any sound source with them and they can also double up as live mics if you play gigs. If Vocals and acoustic sources are what you record, then go for a condenser mic.
-
Headphones
For your first set of headphones, choose closed back. You can use them when recording with less of the sound from them spilling over into a mic.
-
Studio Monitors
Basic speakers and hi-fi speakers are not recommended for critical mix listening. Get the best set of powered studio monitors your budget will allow.
-
Mic Stand
There are plenty of inexpensive boom mic stands available to start with. You want one that has a joint in the middle to allow for accurate positioning and versatility.
-
Cables
You're going to need a few cables - 3 cables will cover your mic and your studio monitors. Check which connection type your monitors need before buying them. They'll either be XLS or Balanced TRS. RCA is rare but again, do check.
Here's a video showing you how to get a basic setu going - note the use of a big screen TV in addition to a computer monitor:
Summary
Plan ahead and work out which pieces of gear you need when starting out to make sure you get the most out of your budget.
The bottom line is to start out with gear that is well-recommended but also affordable. As your skills and your audio engineer's ears develop, you'll be in a better position to get the best gear for your home studio going forward.
If you have any questions about any of the gear on this page, then go ahead and ask in the comments below and we'll do our best to help.
About the Author and Contributors
Original Author: Jason Horton
Update Contributor: Raphael Pulgar
Editor: Alexander Briones


Comments
Really nice recap, wish I'd
Submitted by mixnthis (not verified) on
Really nice recap, wish I'd had this when I was first learning. Two suggestions: delete references to specific brands or models and just point them to your articles for that (I'd esp delete the NT1A, which is known to have a harsher high end). Second, about this on dynamic mics: "These are the work-horse mics of rock..." I'd suggest replacing "rock" with "live music." Dynamics aren't specific to any genre and are typically used live for nearly all genres, though certainly rock is one of the best fits. (And of course they are used for studio recordings as well)
Please do email me i need to
Submitted by kyeomie@gmail.com (not verified) on
Please do email me i need to open an studio but need help from start
We don't provide email
Submitted by Jason Horton on
We don't provide email support on topics like this, instead you can start by reading this article: Advice On Setting Up A Home Recording Studio.
Hello,
Submitted by Rhoda Hall (not verified) on
Hello,
I'm interested in setting up a home VO recording studio. Any recommendations for a good quality mic for a women's voice recording? AKG C414 Thanks!
It's hard to give specific
Submitted by Jason Horton on
It's hard to give specific advice without knowing what your voice sounds like, but the AKG C414 is quite versatile and has very good ratings so that would probably be quite a good choice.
So good article!
Submitted by Ricardo (not verified) on
Such a good article!
You left gaffer tape off your
Submitted by Mitchel Simmons (not verified) on
You left gaff tape off your list - you can never have too much of it!
Please forgive my gaffe :)
Submitted by Jason Horton on
Please forgive my gaffe :)
Actually you are correct - it comes in super handy for temporarily holding gear or cables in place.
Kudos to Alexander who made sure he included it in his overview of live music gear at https://www.gearank.com/articles/live-music-gear#Gaffer-Tape